


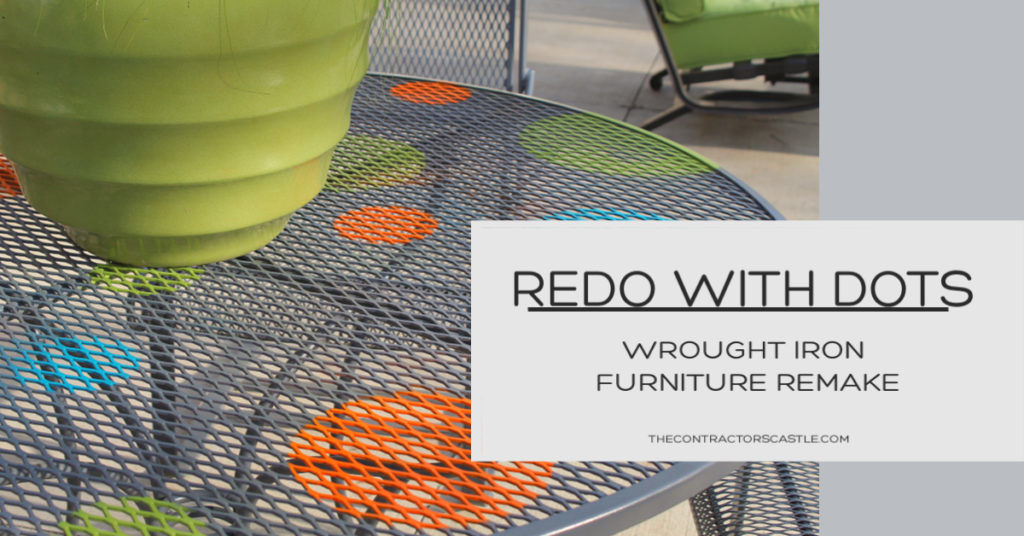
This DIY Wrought Iron Patio Furniture Redo is what happens when I have too much time on my hands! As you might know, I spent some time last Fall redoing our wrought iron patio furniture. Our rusted wrought iron patio set was worn out, dirty, and an eyesore on our new backyard patio. Not anymore! Now our wrought iron patio furniture looks brand new and so fun with the Dot Redo!
Click on this link👉 Wrought Iron Redo for step-by-step instructions on how to clean up your worn metal patio furniture and make it look brand new!
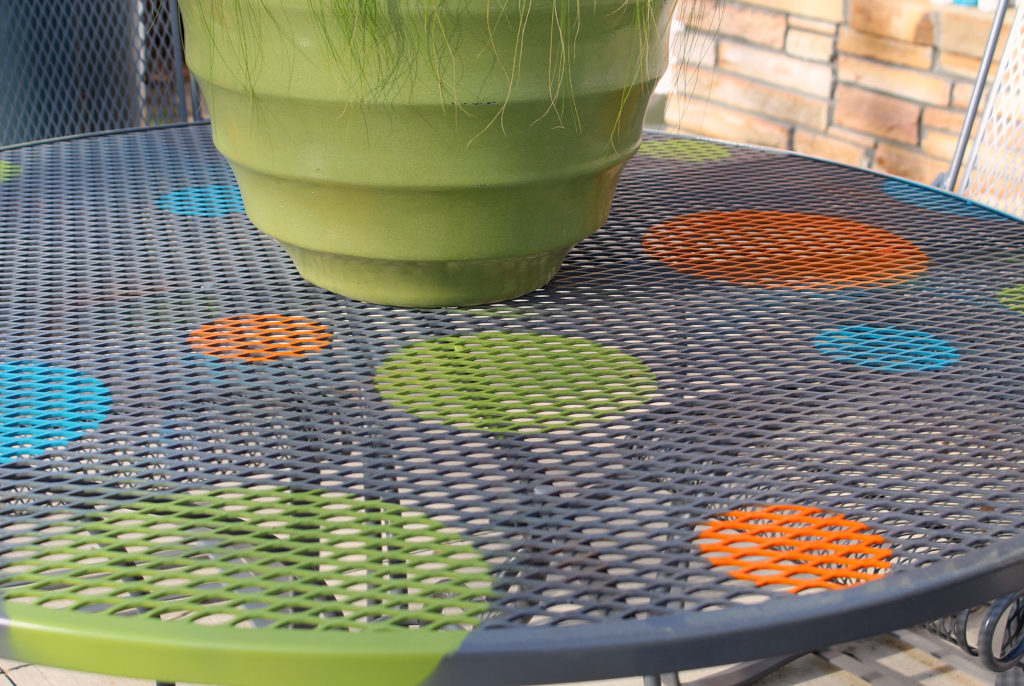
REDOING THE REDO WITH DOTS!
Personally, this is my favorite redo I’ve done so far. The polka dots add a splash of color with an amusing vibe

DIY WROUGHT IRON PATIO CHAIRS
Unfortunately, I’m not done…the chairs, Ugh!?♀️. I have a feeling some choice words are going to pop out of my mouth during that project…Beware, Family!
This project looked a lot easier than it actually was. I kept telling myself if it turns out really bad at least I could spray paint it back to all gray. Thank goodness all went as planned…something fun, happy, and with a little bit of WOW!
STEP BY STEP PATIO FURNITURE REDO

Step 1:
OK, I know what your thinking this looks so amateurish. Well guess what it is but it got the job done!
Loosely covering the underside of the table was absolutely necessary to protect the legs from the orange, green, and blue paint. It prevented smear and overspray underneath.

You’d think circle stencils would be easy to find online but they’re not. I must have searched for a week and finally found on Houzz, approximately $35 including shipping
Step 2:
I added the white card stock border so they wouldn’t stick together. Turns out the little bit of sticky back that I didn’t cover helped keep them in place while I sprayed. The newspaper was for an extra layer of overspray shield.

These stencils have a sticky back which I can’t decide if helped or harmed during this project.
Step 3

As you can see I ended up adding more paper shields. The wind, ugh the wind!, picked up and I had to shut it down for the day.
Step 4

As you can see the next day was less windy and got more done. I sprayed on opposite sides of the table as not to smear the wet paint. This is all I was able to get done on day 2.
Step 5

Day 3 & 4 went a lot better. The key to this project was to take plenty of time and not get in a hurry. The hardest part was knowing when to stop! More dots could have been added but sometimes less is more. I can always go back and add more.
Day 5 & 6 was the cleanup day. I did have over-spray and smear spots. I used a disassembled cardboard box and the edge of the stencil to shield the dots from over-spraying the dark grey base coat. That was pretty tricky.

I still have one really faint spot I missed but sometimes you just have to stop while you’re ahead. No one’s pointed it out yet…and I live with a very critical bunch!
All in all this project took about 5-6 working hours and 6 total days. A lot off time was spent waiting for the paint to dry. You need patience, time, good weather, and a steady spray hand!
REDO UPDATE…THE CHAIRS ARE DONE!!!

MATERIALS NEEDED FOR WROUGHT IRON REDO
- Spray Paint…I used Rust-oleum Ultra Cover. It’s a 2 for 1…paint and rust guard!
- My color choice was:
- Dark Gray for the base coat
- Real Orange
- Lagoon Blue
- Eden Green
- Stencils from Houzz. Note: I probably searched a month off and on for the right method to spray paint polka dots. I tried to make my own out of cardboard which, of course, was a big, fat failure. When working with spray paint the edge of your border has to be sharp and crisp for a well-defined clean look.
- Painter’s Tape
- Newspapers
- Cardboard
- Copy Paper
- Spray adhesive
- Non-windy, not hot days! The fall is perfect for a project like this!!
Drop me a comment and let me know what you think!
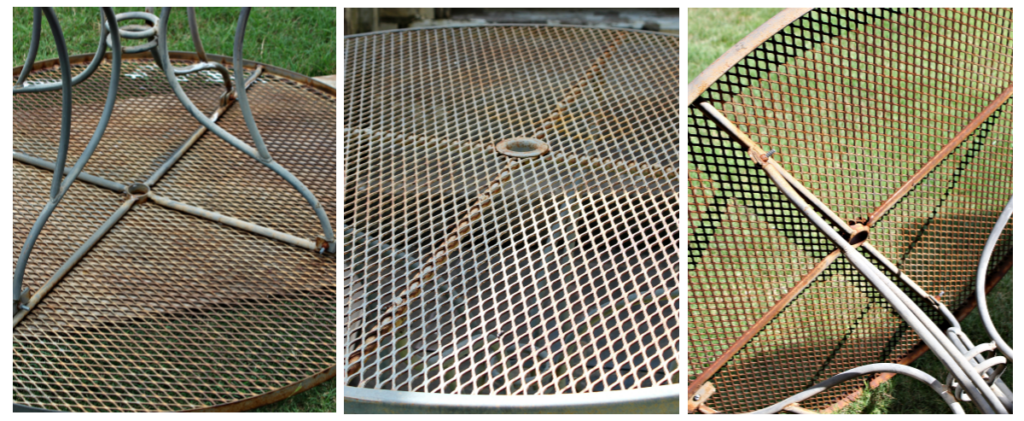
BEFORE THE DIY WROUGHT IRON REDO👇
AFTER DIY WROUGHT IRON PATIO FURNITURE REDO⭐😁⭐


You May Also Like

How to Build an Easy DIY Gar ...
March 7, 2024

Just Like New…Wrought ...
April 15, 2019

Deco Makeup Chair Makeover-T ...
September 18, 2018

Homeowners Homework…re ...
June 26, 2018


Blog Comments
Easy Step by Step Vertical Trellis - The Contractor's Castle
August 20, 2019 at 6:47 pm
[…] https://thecontractorscastle.com/redo-the-redo/ […]