


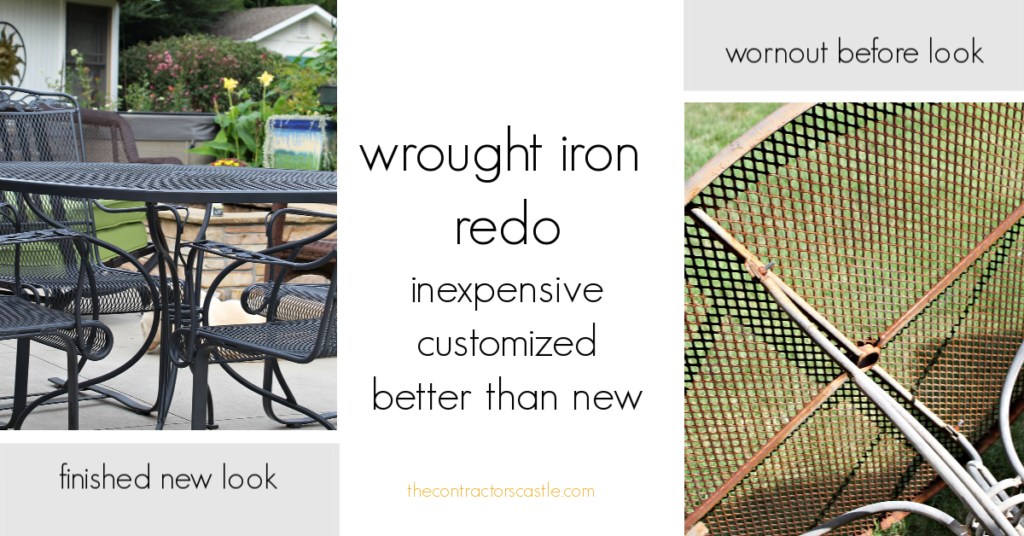
You don’t have to buy new patio furniture to get that just like brand new look! Redoing your old, worn out wrought iron and saving $1000 plus on new “affordable” outdoor furniture that won’t look good in 3 years is definitely a smart option to consider.
Just think how far that $1000+ would go on something that really matters. Like a memory making vacation to the beach or an awesome road trip to the Grand Canyon!
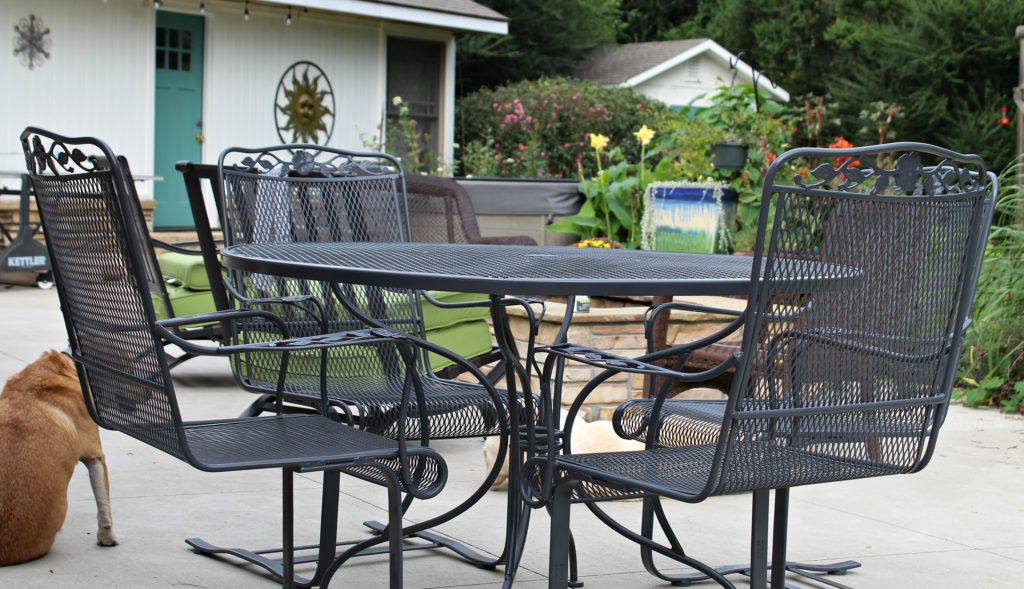
The contractor and I were gifted this Woodard Wrought Iron set from “JP”, my wonderful father-in-law, when we first got married. It was brand spank’in new and we were so proud of it. It looked great on our first deck of our first house; the cutest house we ever owned…Awwww!
Fast forward 27 years?♀️ and it’s worn and rusty and just tired. In fact for the last 7 or 8 years it’s purpose was more of a “sh!? catcher” than an outdoor eating space.
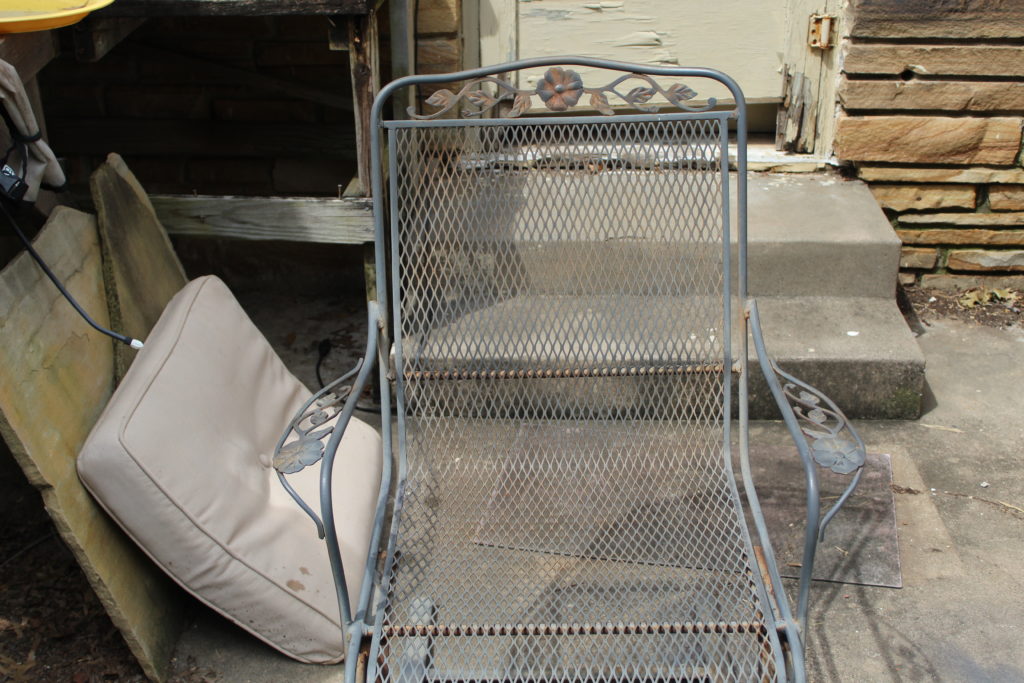
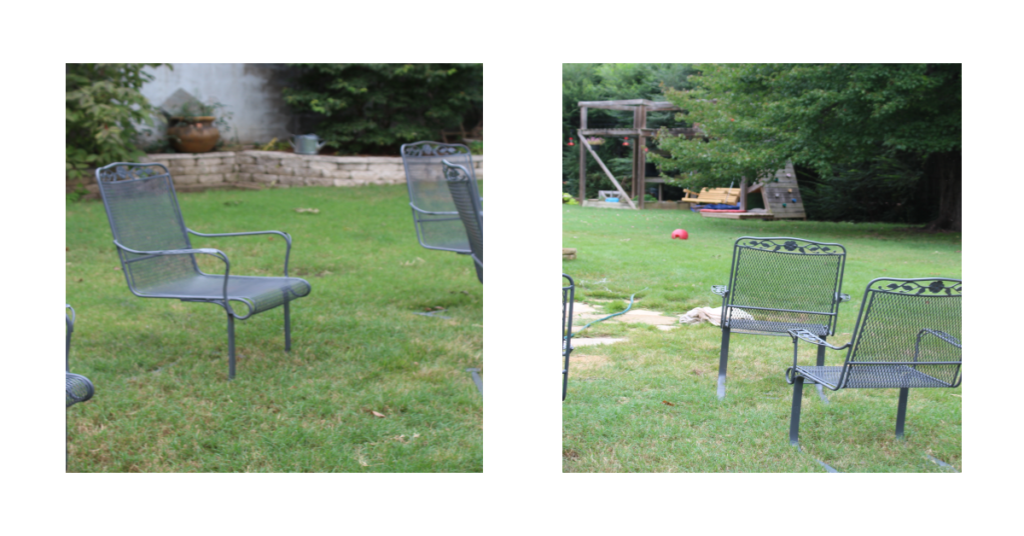
Surely you’ve had wrought iron furniture that resembles this ?.
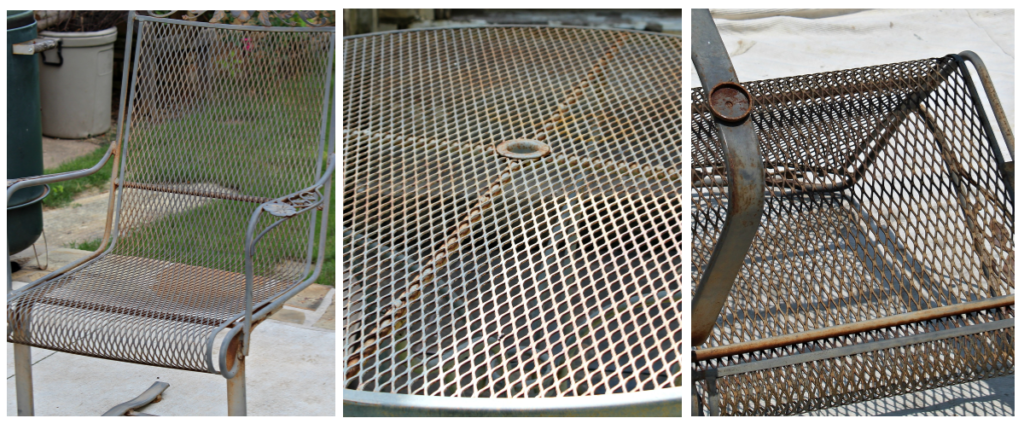
The beautiful dirty glow of years of memories and extreme weather. A little out dated with the flowers and all but still it’s worth the effort. If my memory is accurate I think it was around $800 brand new. Now days it would be at least twice that much and not the quality.
You talk about heavy, durable, and something that will survive the coming zombie apocalypse! This set will definitely be around for my great grand childen…but of course they won’t want it…no one will by then?♀️.
I’ve had this project in my head for a while but it always would come to me in the middle of the summer when it’s way too hot to do anything outside. Then by the time it’s cool enough and I’ve recovered from the heat I would forget about it… but not this time.
Prep time – Wrought Iron ReDo
This project got started at the end of August last year when we had an unseasonable cool, still day.
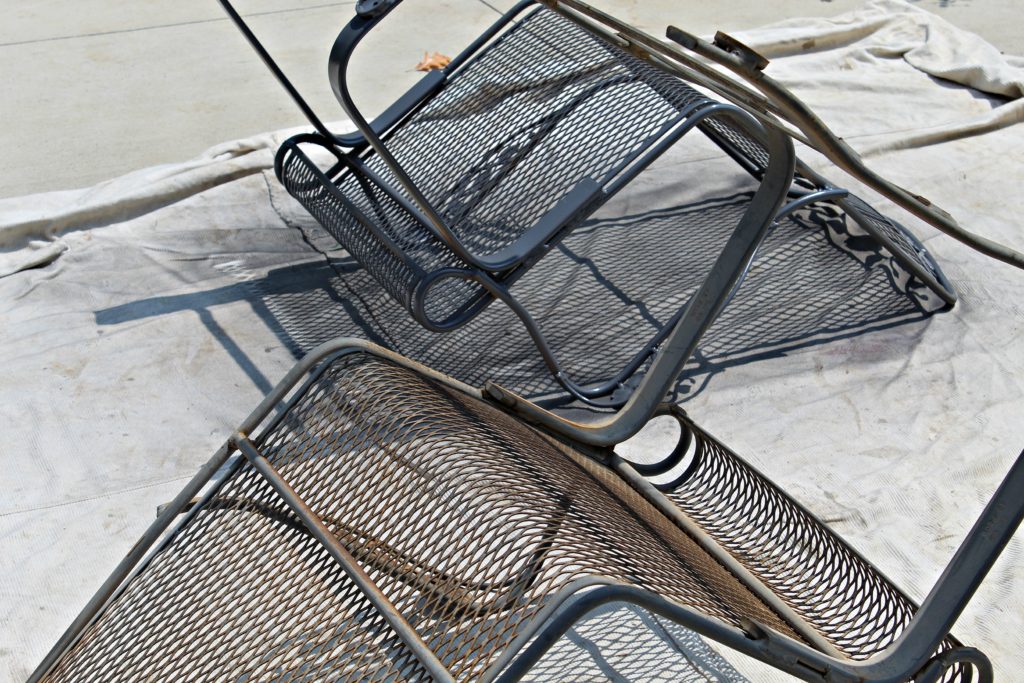
Of course, the first step in any project is the prep and it usually starts off with a drop cloth.
Step by step instructions
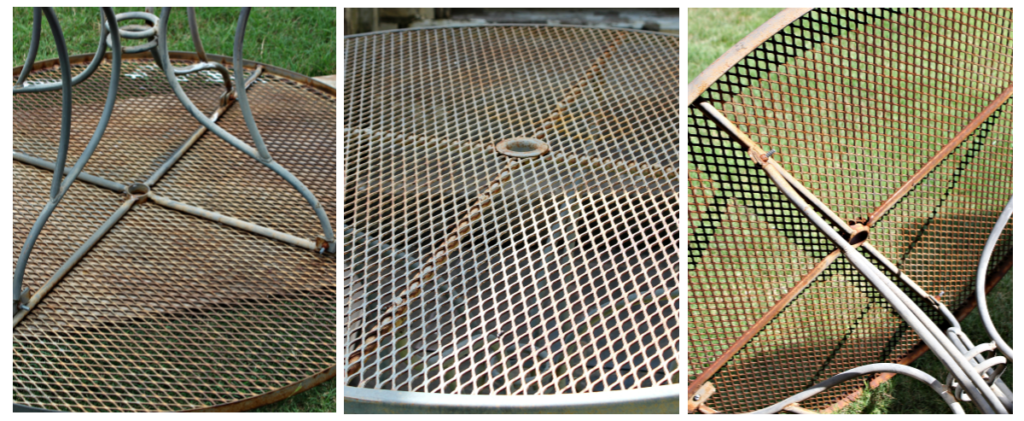
Step 1: Scrape and sand and scrape and sand. The above chairs were sanded and scraped first. I used a 120 grit sandpaper and a metal scraping tool to tackle the really hard rust.
Step 2: Once step 1 is accomplished make sure you wipe the rust dust off really well with a wet towel. Let it set for about 30 minutes just to make sure all moisture has evaporated.
Step 3: Now for the fun part…start spraying. I used Rust-Oleum 2X Ultra Cover Paint+Primer, Dark Gray Gloss. Side note: It doesn’t matter if there is no wind…there will always be over spray. Like the over spray that appeared on our new concrete patio! The Contractor wasn’t happy?♀️! Oops:(
Step 3 continued: Move project to a safe zone…the yard dungeon. The place where all my projects are sent when they go rouge!
Step 4: Lightly sand again and then wipe down the painted area. Look for missed spots. Sanding a second time on your first coat will ensure it’s smooth and silky to the touch.
Step 5: Spray a second coat making sure all areas are painted. Note: when painting wrought iron with a weave backing pattern make sure you paint from all angles. Every surface needs to be painted or else you will get a dull look.
Now that the chairs were 80% done, the table was next.
Step 6: Start on the table following Step 1 through 5. Believe it or not the table was in worse shape than the chairs, more rust buildup.
Using a toothbrush I experimented with vinegar and baking soda on the tough spots but it made more of a mess than it helped. So I got out the electric sander. I went through more sand paper this way but it got the job done:)
Spraying the table was a breeze and super fun.
The first pass on the bottom didn’t take long at all. The next day I had to re-position it upright to spray the top. This is why it took me so long. Every paint pass you spray you have to wait a day for it to dry. The can says 2 hours but I’m not sure they meant dry time in Oklahoma…humidity plus!!!
Having fresh eyes on your project the next day really helps in detecting the missed spots.
All in all the table took me about a week to finish, 3 coats of paint, and twelve cans for the whole project! At $2.75 a can, approximately $40, that beats buying a brand new expensive set!

Wow! doesn’t that look better?! I can’t believe how a fresh coat of paint makes the whole patio area look fresh and new! I would say this project took about 10 total hours from start to finish. If you have an indoor workshop area then you’re golden! I don’t, so it took me 10 hours spread over 3 months. But at least I got it done before winter hit…yay me!
Always,
Elise
Look for my updated wrought iron redo polka dot post!!!


You May Also Like

How to Build an Easy DIY Gar ...
March 7, 2024

DIY WROUGHT IRON PATIO FURNI ...
April 17, 2019

Deco Makeup Chair Makeover-T ...
September 18, 2018

Homeowners Homework…re ...
June 26, 2018


Leave a Comment