


4 HOUR MONTH!
Hi Y’all! I’ve been working on this little deco style makeup chair makeover for the past month. For such a little squat you’d think I could have done it in less that a day. Truth is it probably didn’t take me more than 4 hours total! Busy time of year… getting kids where their suppose to be, a quick-long road trip to West Texas for my niece’s wedding shower, selling a few houses to the best buyers in the universe! Life is sweet right now and this little project just added a little sugar!
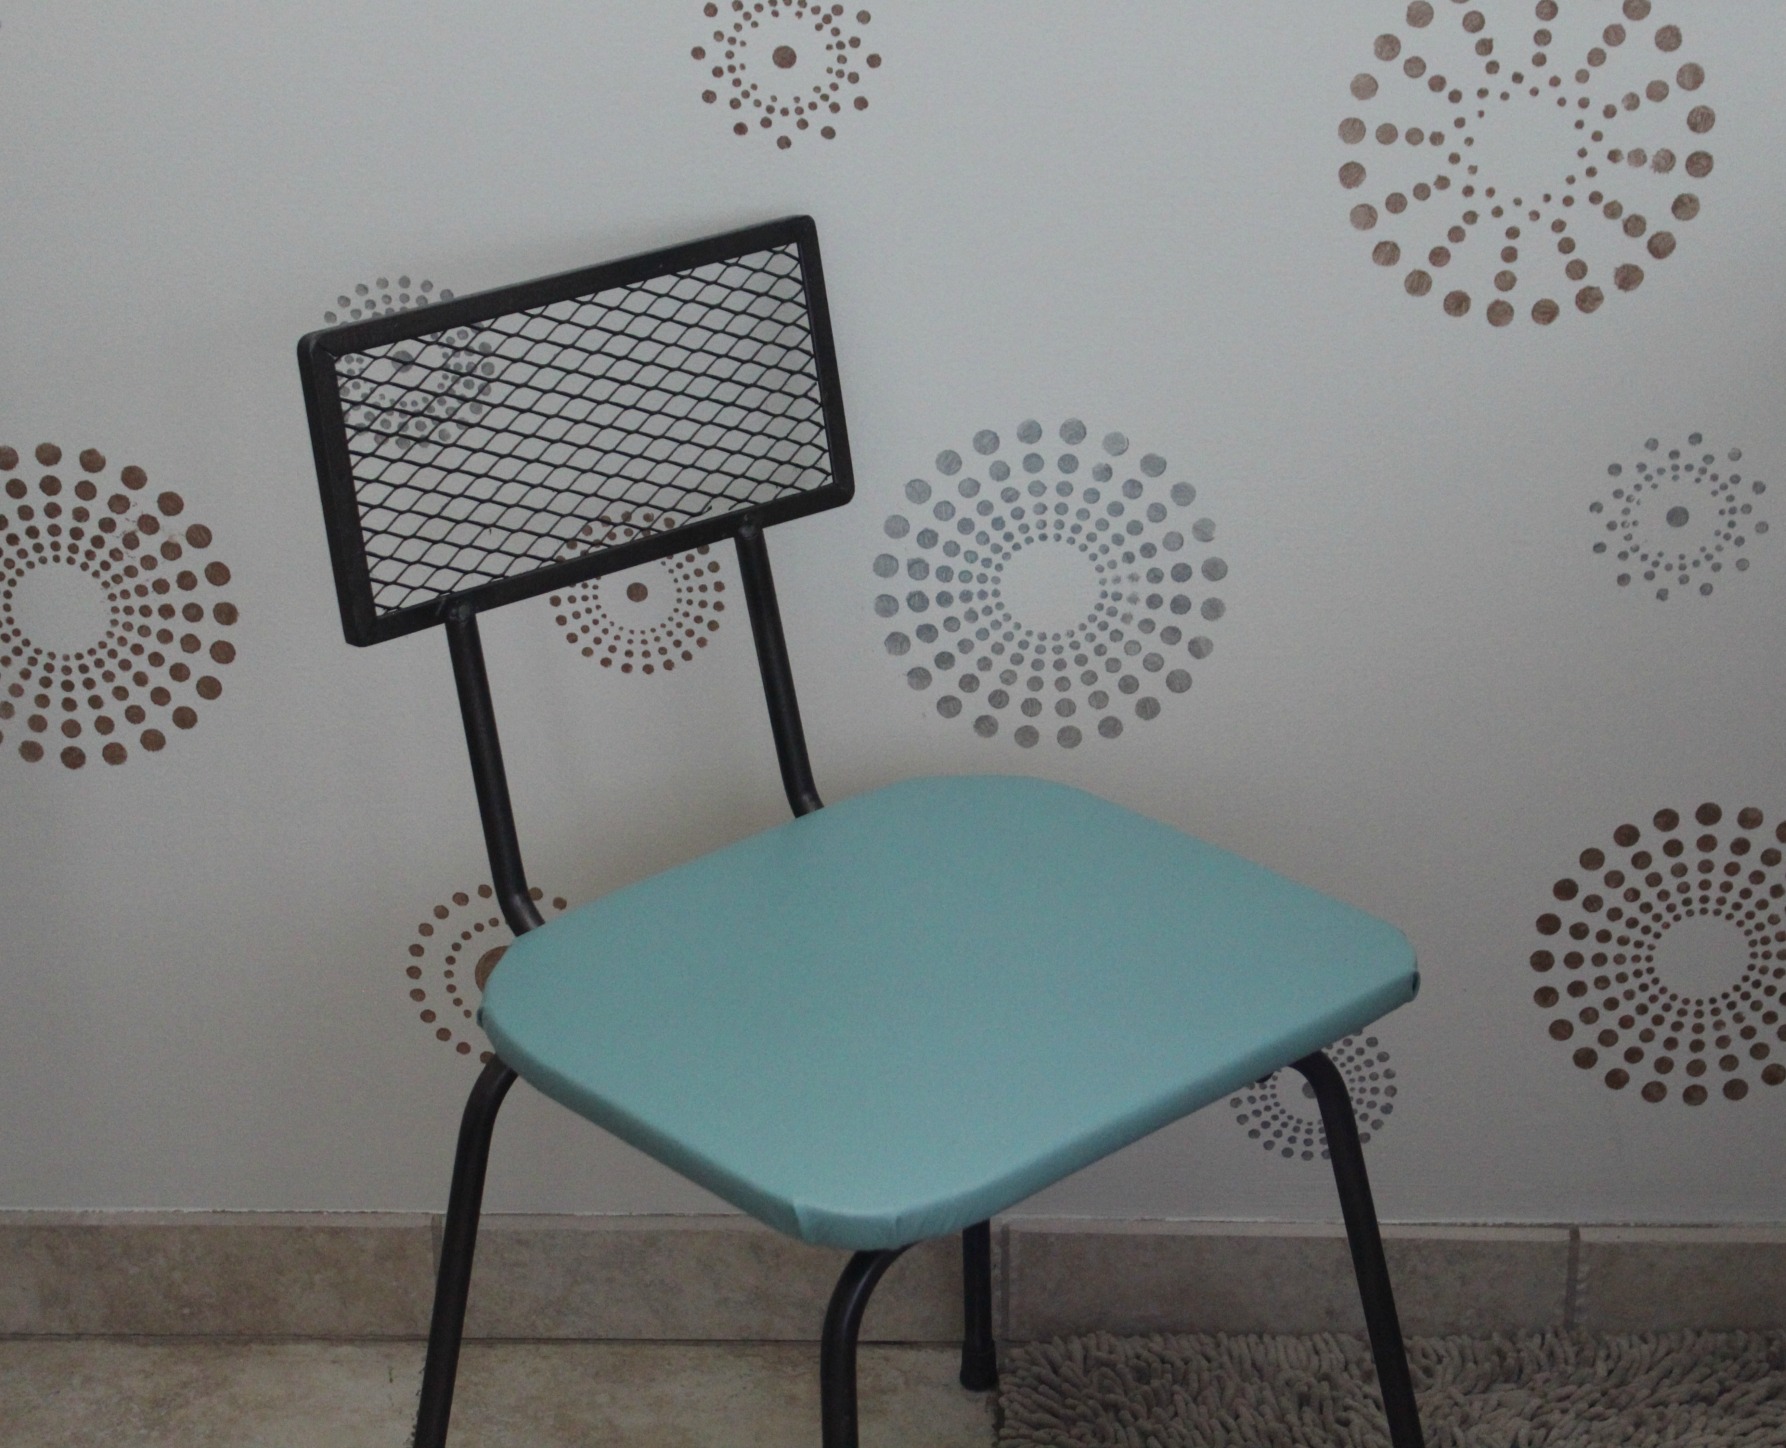
Adorable Makeup Chair – Deco Style
This little chair has been in my life ever since the Contractor and I have been married (lonnnngggg time) and in every master bath we’ve owned with the exception of one…the Trenton House. The absolute smallest MB in the history of indoor plumbing; Barbie size…just not pink AND the coldest floor this side of the north pole.
HEATED FLOORS IN BATHROOMS SHOULD BE A CODE REQUIREMENT!
It was purchased for about $75 (which was A LOT at the time) at one of my all time favorite shops, Mango and Salsa, which sadly has been closed for a long time now. Wrought iron wasn’t particularly popular then but I’ve never been one to go with a trend. Hey, but now it’s popular and with good reason; it’s so durable and can be easily updated and redone to make it look brand new plus the redo part can be super cheap.
Paint, vinyl fabric, and sand paper costs all of $25, maybe less.
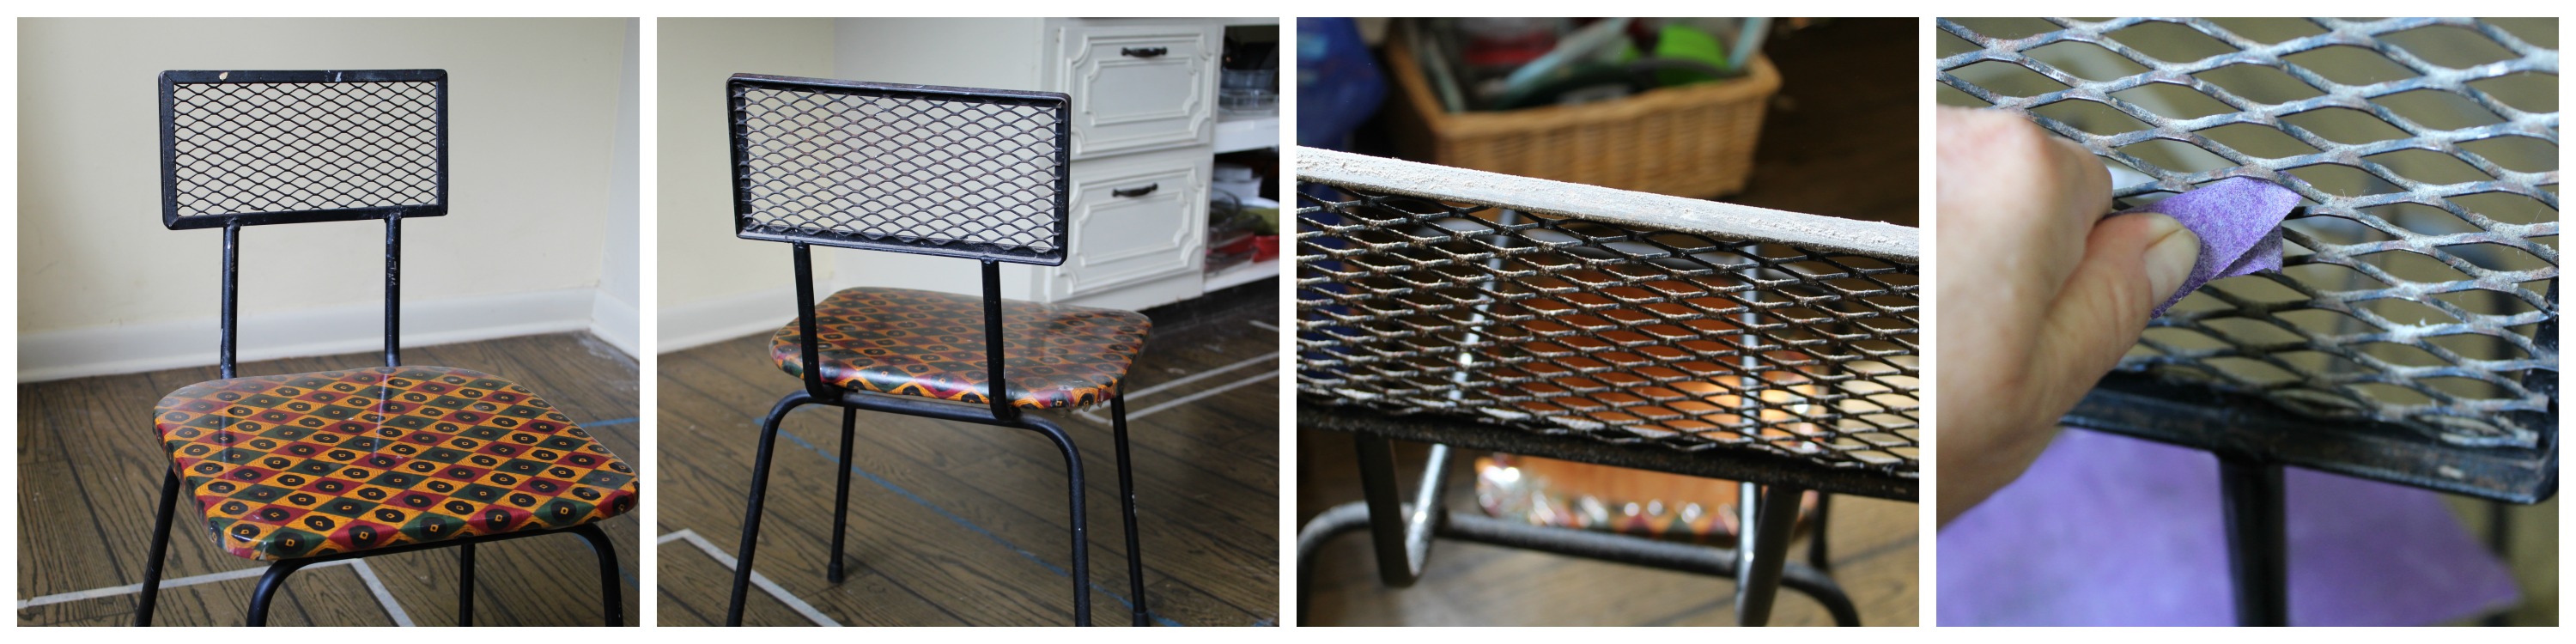
I HATE PREP (prepping the metal)
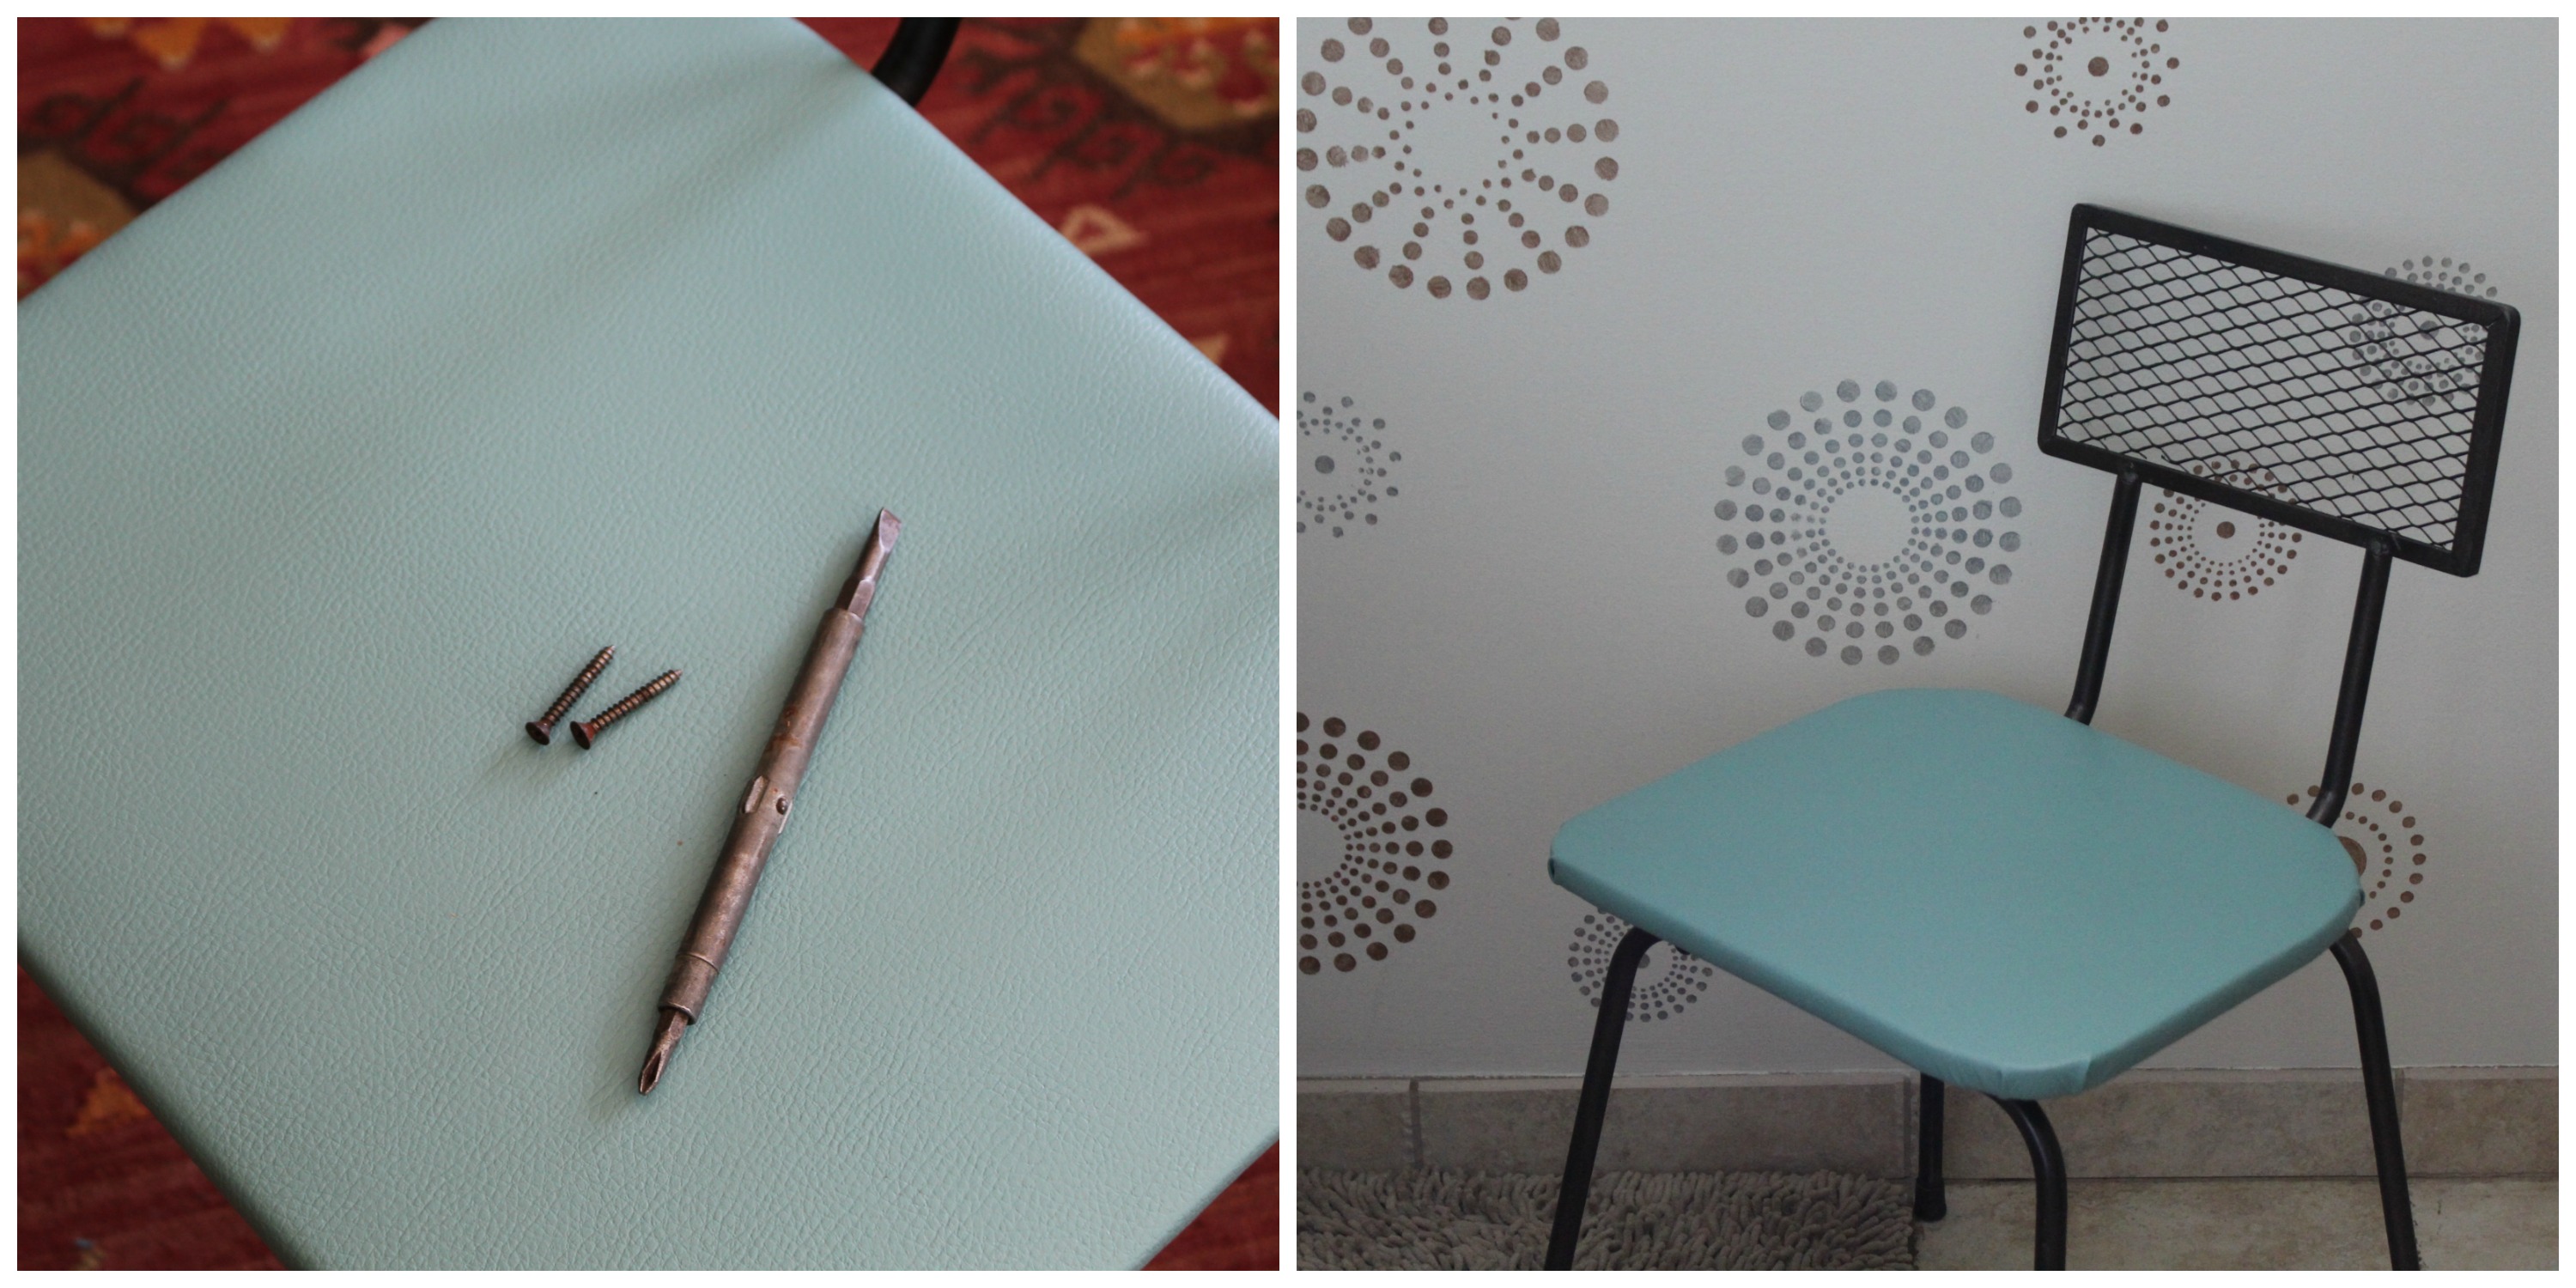
The worst part of a project like this…big or small is the prep, ugh, I hate prep! But its super important! See the white stuff pictured above ?? It’s not sanding shavings from the old paint…it’s hairspray and other bathroom yuk that’s built up over 25 years! Kinda gross y’all! Eventually I figured out rubbing alcohol and Q-tips would make the de-yukking easier. The bottom part of the chair was a breeze, sanded it lightly to make it smooth. Wipe down with a soft rag blotted with white vinegar.
Deco Metal Frame
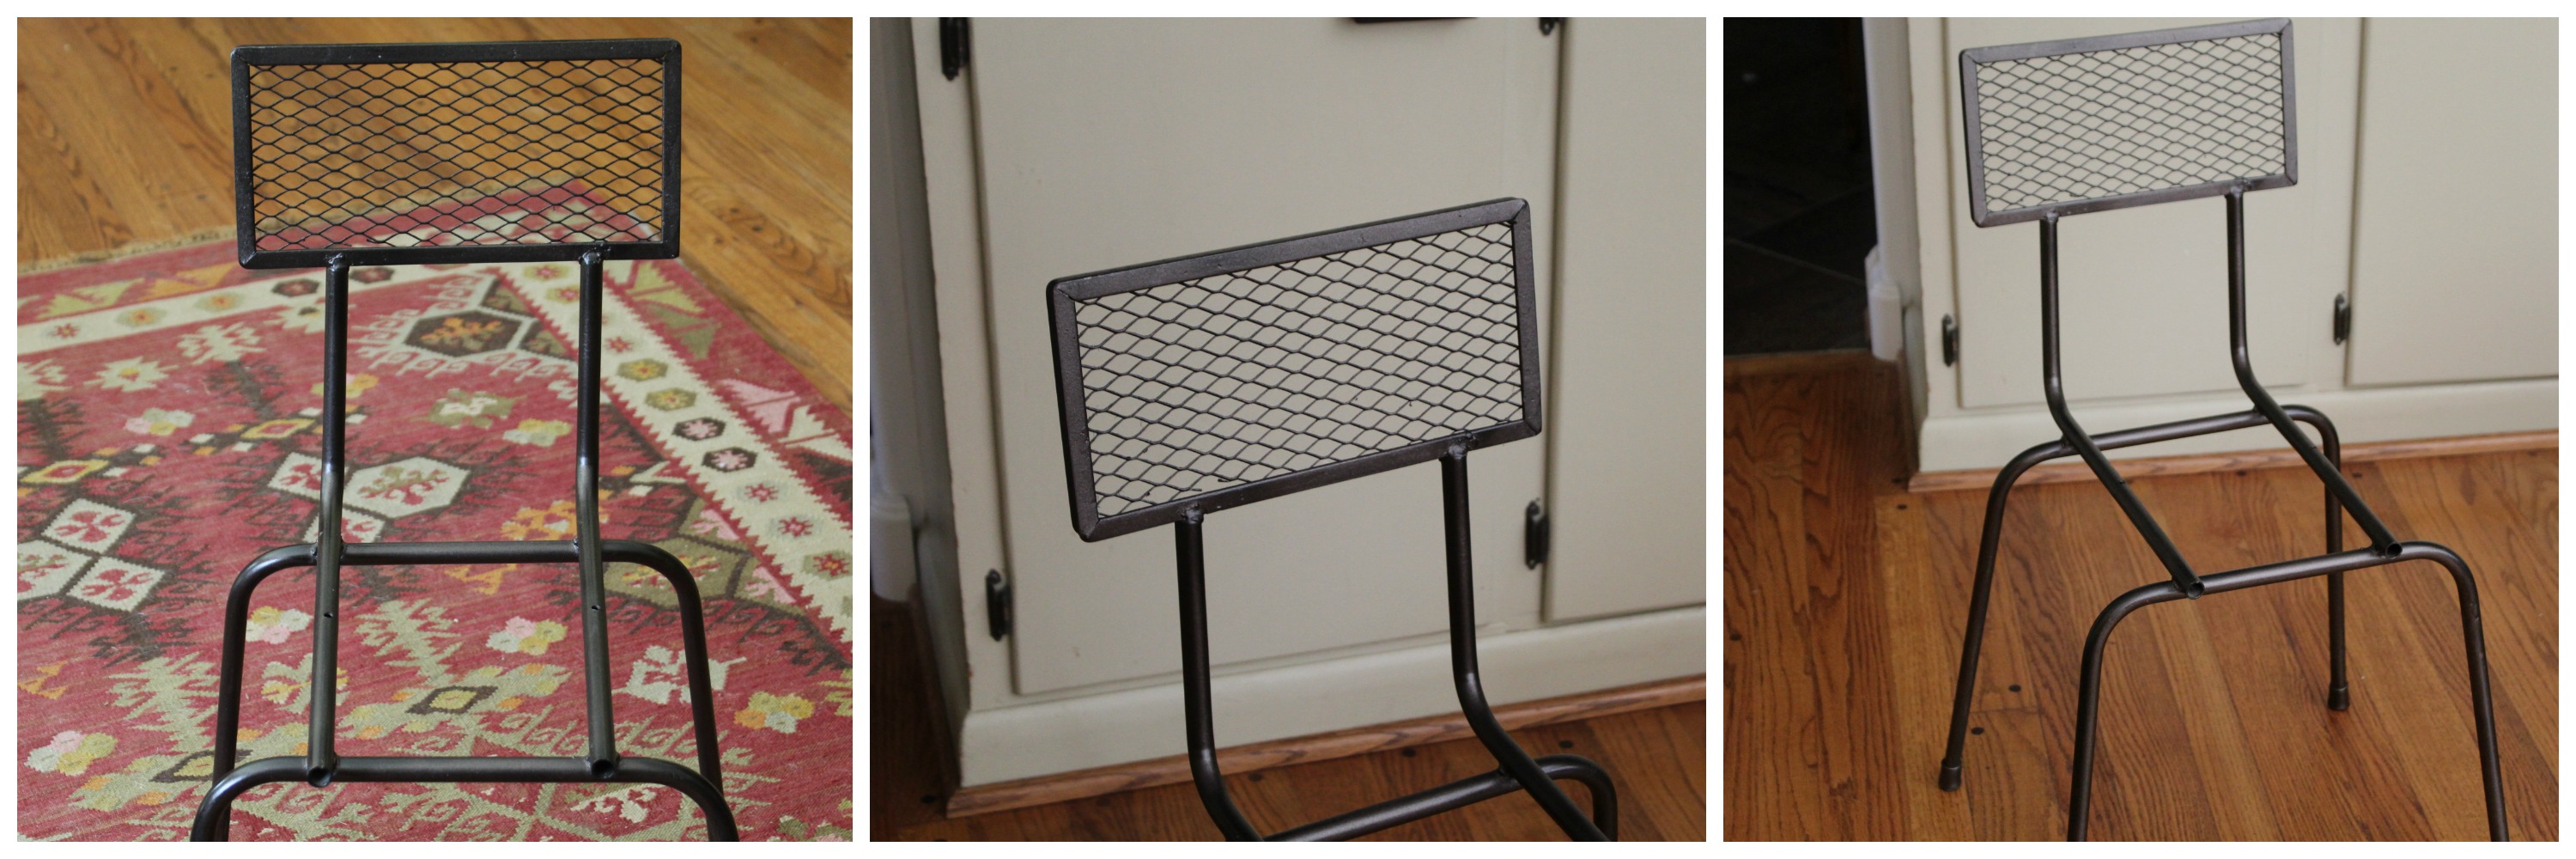
PAINTING METAL FRAME
After the cleanup process the fun starts, painting! Coordinating the current metal materials in the bathroom I used Oil Rubbed Bronze metallic paint for the frame. The primer is already in the paint which saves a step. Spray painting is definitely easier these days with the awesome colors and type choices than when I first started 25+ years ago.
 The Hardest Step
The fabric was the hard part, so many choices! Thinking cheap, Hobby Lobby was my first stop. I knew they carried some fun vinyl fabric. Unfortunately, I didn’t find any fun stuff so I settled on a black embossed vinyl piece. It was only like 7 bucks so if something better came along I wouldn’t be out much. After about a week I knew it wouldn’t work, so I started looking online. Fabric.com popped up with a great selection and an even greater price range! The vinyl that really spoke to me, of course, was in the $30-$50 a yard range with the exception of the turquoise one pictured above. It was around $5.50 a yard with a 2 yard minimum plus shipping, not bad! Changing it later if I get bored won’t be a big deal; like to bright orange or tomato red!
MUSCLE POWER
The rest was pretty easy except the old stable removing part; thank goodness my Contractor likes my smile:) Strong finger muscles really come in handy with old staples removal.
ASSEMBLY STEPS
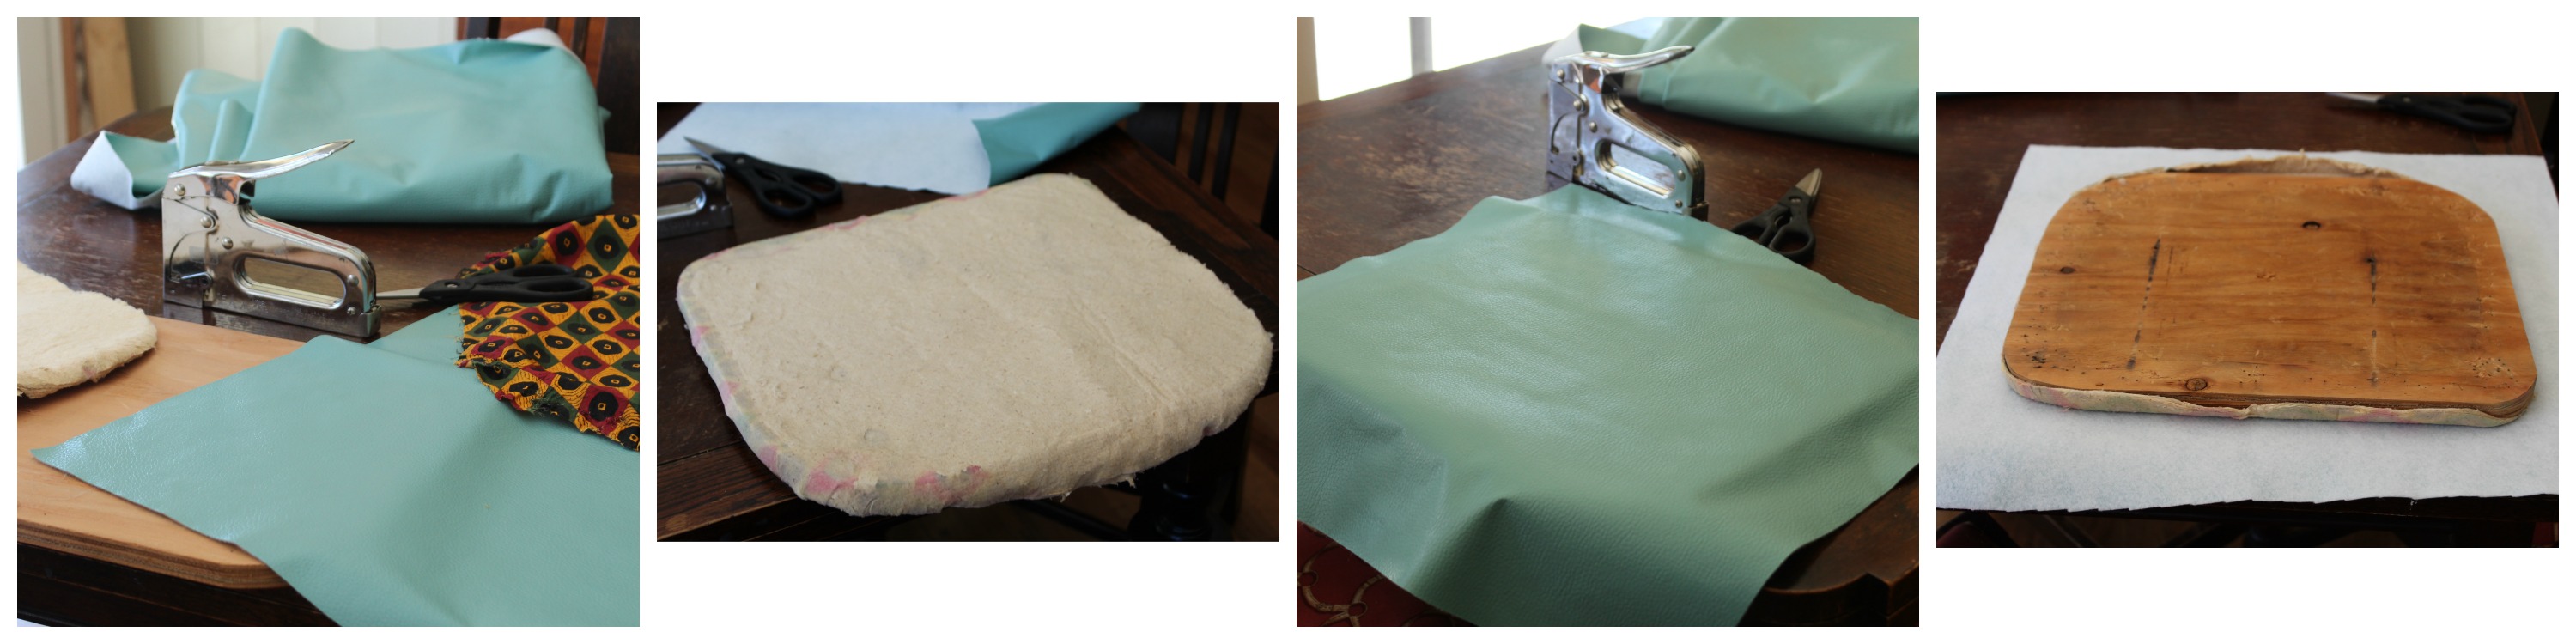
- Cut your fabric about an inch larger on all sides using the old fabric as your pattern.
- If savable, save your old cushion batting and reuse.
- Place the new fabric right side down on the work table and place batting on top.
- Mold the batting around the board making sure everything is squared up.
- Fold fabric over one side of the board. Using a staple gun shoot your first staple into the middle of that side.
- Go to the opposite side and repeat the above step, making sure you still have everything lined up and pulled taunt.
- Staple the remaining 2 sides the same, making sure the fabric is taunt and fabric is still square.
- Repeat the steps above over and over until you get to the corners; CORNERS ARE LAST!
Cushion Assembly
CORNERS
- Corners on a curve are more challenging then square corners.
- First, find the middle of the corner and pull tight and staple, then work the fabric into a pleat and staple. This step might take a while to find the exact look you want. (Note: if your cushion is inset into a chair frame then the overall corner pleat probably won’t be noticeable, take this into consideration before you start)
- This cushion was exposed on all sides so I really wanted to make it look neat, most chairs aren’t like this.
- Trim the excess fabric on bottom of cushion to clean up the underside.
 The great thing about staples is they are pretty forgiving…meaning you can always pull them out and do it again!
Align the refinished cushion screw holes with the frame holes and start screwing:)
Whew, enjoy your new look!
TYFR,
Elise
Disclaimer: Clicking on the informative,interesting, and helpful advertisements in this post will result in a very small residual for this blog so please feel free to click away:)
What you’ll need:
Furniture Item
Decreasing Agent, White Vinegar, or Rubbing Alcohol
Q-tips & Rags
You May Also Like

How to Build an Easy DIY Gar ...
March 7, 2024

DIY WROUGHT IRON PATIO FURNI ...
April 17, 2019

Just Like New…Wrought ...
April 15, 2019

Homeowners Homework…re ...
June 26, 2018


Leave a Comment