


Back in the day the porch swing was as American as baseball, apple pie, and Yankee Doodle Dandy!
A big wide covered front porch was a place for family and friends to gather after dinner or sleep on a hot summer night or swing with a new beau that came to court.
My Papa’s porch (below) was the place to hang when we went down to visit. It’s where everyone gathered after a huge family Thanksgiving. Now that I look back, I think my mom and her siblings were probably consuming “evil spirits” while the 15 grand kids were either fighting over the porch swing, pushing each other in the red radio flyer, shot putting the resident cannon ball, or off hunting squirrels. Times were slow, steady and easy!
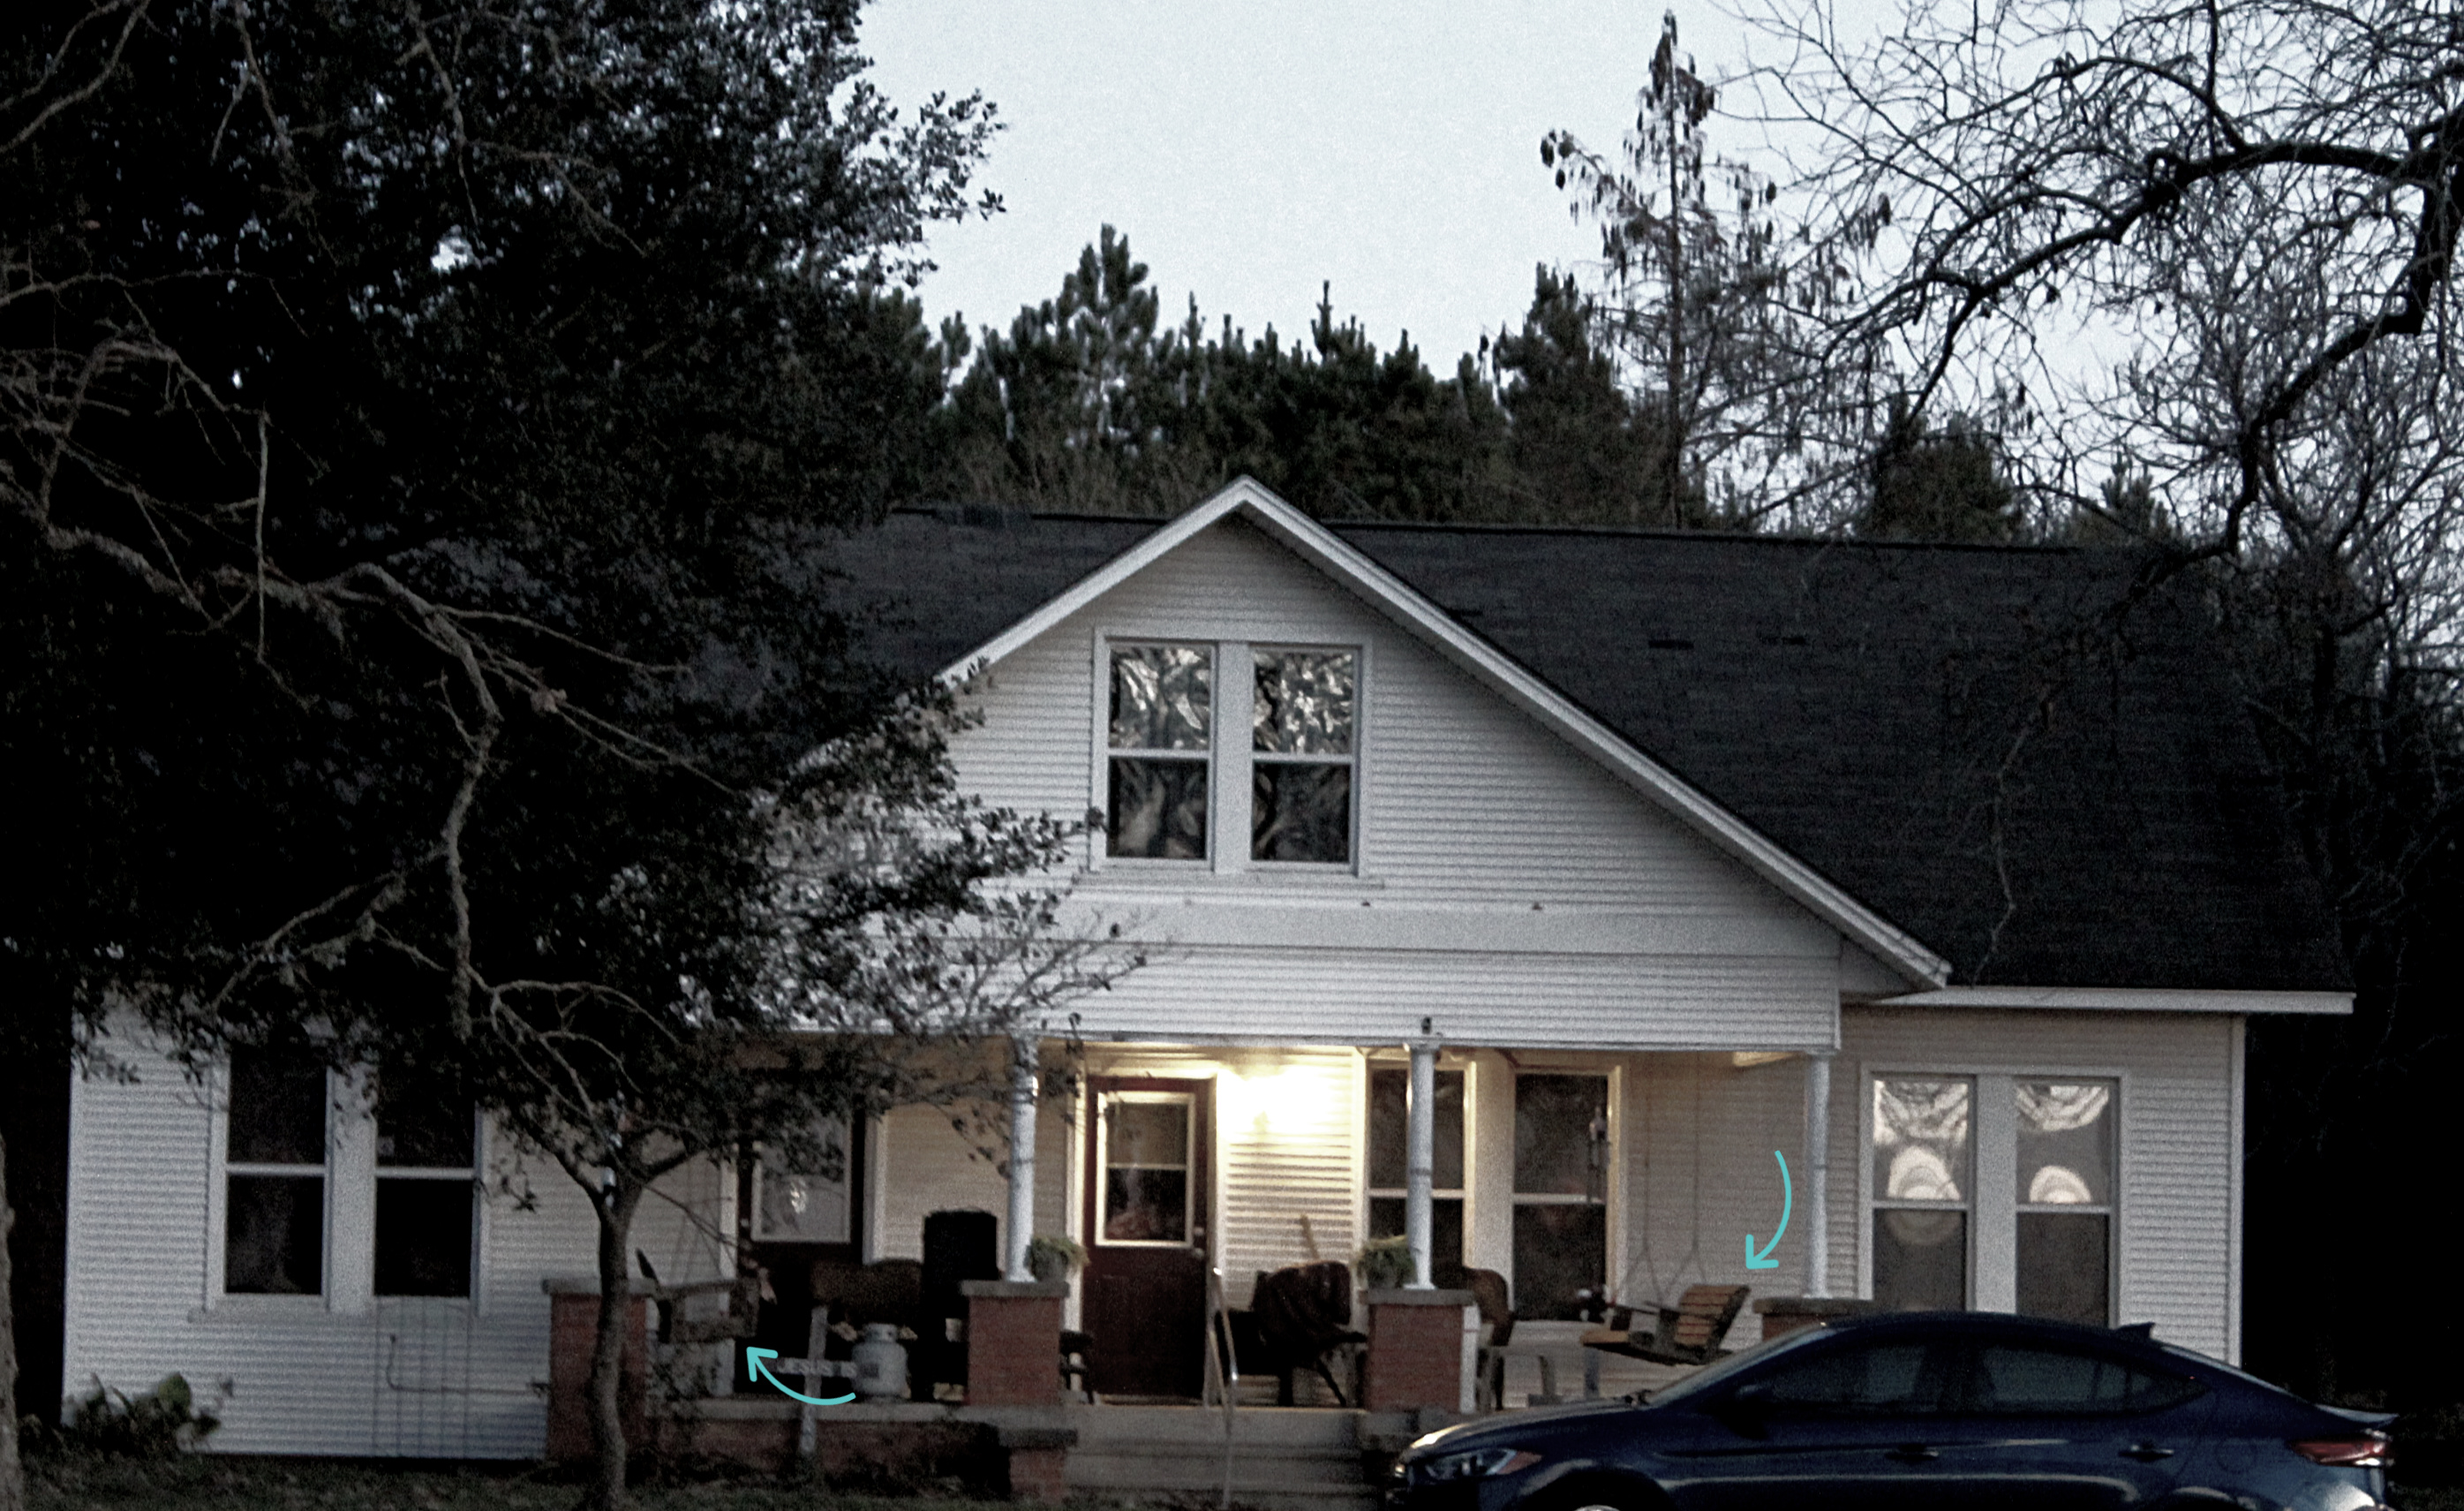
My grandfather’s house
When we started remodeling our existing home about 10 years ago our porch was about 4 feet wide, 12 feet long, and hidden by overgrown boxwoods. The house was built in 1950 and was designed around the backyard not the front. No one ever used the front door…we used the garage door!
It took about 4 years of living in the house before we decided what kind of front to put on. We wanted it large enough to include a porch swing or big, comfy lounge chairs…the lounge chairs won.

Kit Assembly
This Cypress wood swing came in a kit and was my birthday present last year. The contractor told me later he bought it with funds from selling his old gold fillings the dentist replaced a long time ago, LOL! Never knew you could do that!
I wanted a plain swing so I could customize it. As always it took me a while to come up with a plan but now that it’s done…I love it!
Pre-Planning
Incorporating the swing to blend with our house was important but I didn’t want it to be too matchy, matchy. At first, the sage teal green color of our bedroom and shed doors was going to be the color of the swing but I had second thoughts and decided to experiment first.
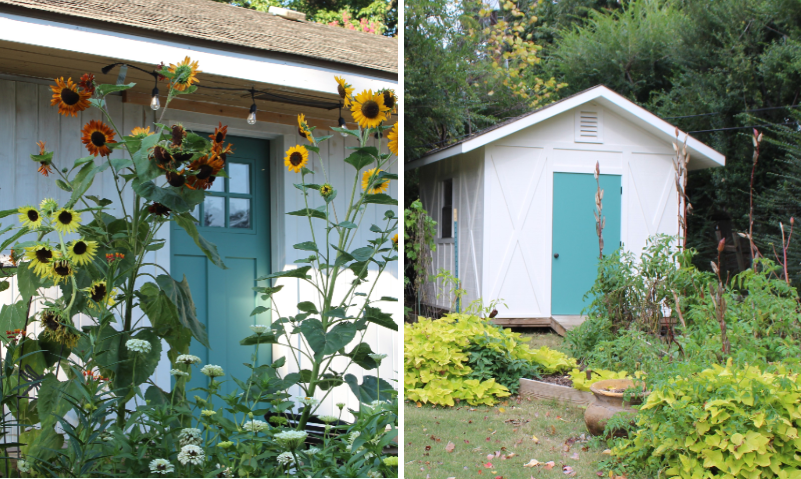
Backyard Doors
It just made sense to use paint we already had. Trying not to overuse the door color I experimented with a lime apple green color we used on our lake cabin. When diluted with half water to make it spread easier it turned out yellowish. Nope!
Purple would have been fun but watered down it looked pink…Nope again! So back to the door color.
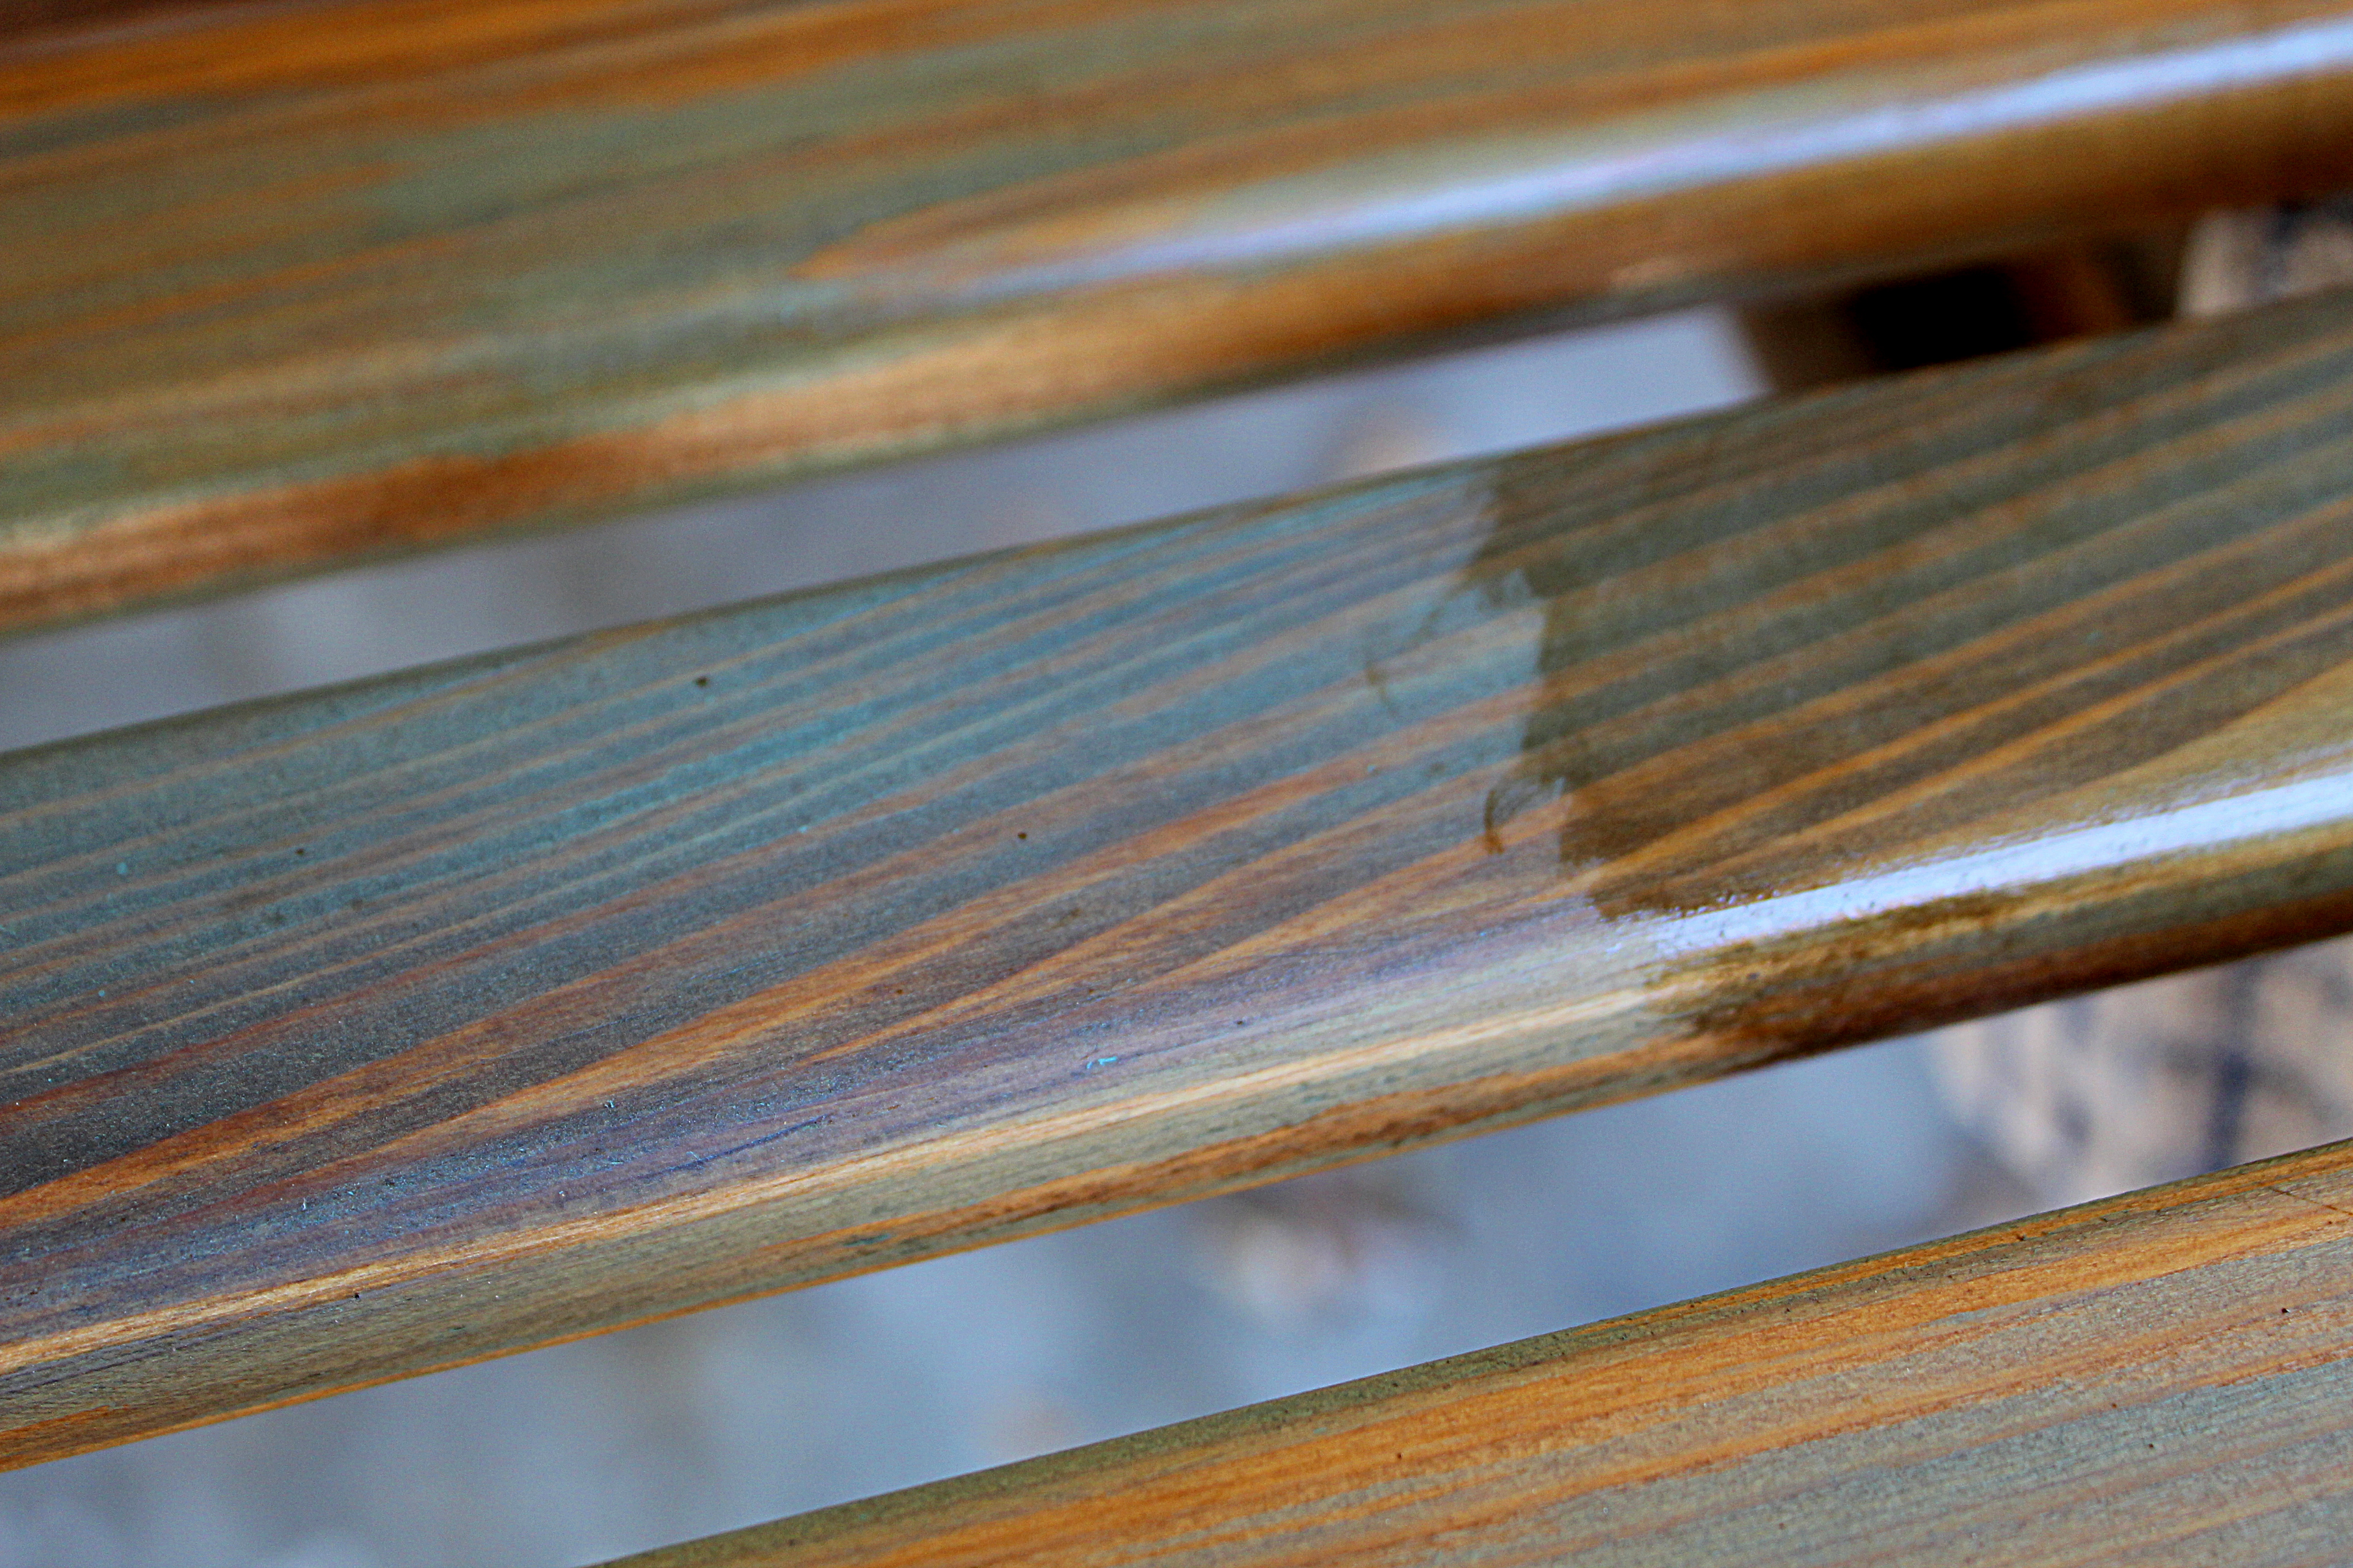
I experimented with the teal, white paint and water mixed in… it was better. But, I eventually nixed the white and just used a 1:1 ratio of teal green acrylic and water. Then for the finished layer, a walnut wiping stain.
Finally…I had a plan!

Making sure I knew what I was doing I referred back to this great “how to” blog on Pinterest. Kinda of barn wood style with a rich, layered look and the Lovely Crafty Home site was my teacher.
When working with wood you first need to be somewhat knowledgeable about the kind you’re using. In the tutorial they were working with pine and my project was cypress. Since they’re similar in density, soft, I generally followed what they did.
First off you have to make sure the surface is primed and ready to paint. An electric sander is a must if you don’t want to be at it all day. After sanding, make sure to wipe it down really well with a clean soft cloth.
With any new technique a little trial and error is always a good idea. Pictured above is the experimental piece of wood..we have a
lot of those laying around. I sanded; wiped it down, then started playing.
After a few tries, I had it down.
Phase 1)
Sand your project until silky smooth then wipe clean.
To get a richer and more dimensional look, I decided to stain the entire swing for the first step, starting with the back and bottom.
Apply the wiping stain with a broad brush one board at a time. Let sit for a minute then wipe while rubbing in with a soft cloth.
Let this dry for at least 6 hours or over night.
After the stain is completely dry, lightly sand, then wipe with soft cloth.
Note: The stain is oil based, keep brush from drying out by wrapping it in plastic wrap or enclose it in a plastic baggy.
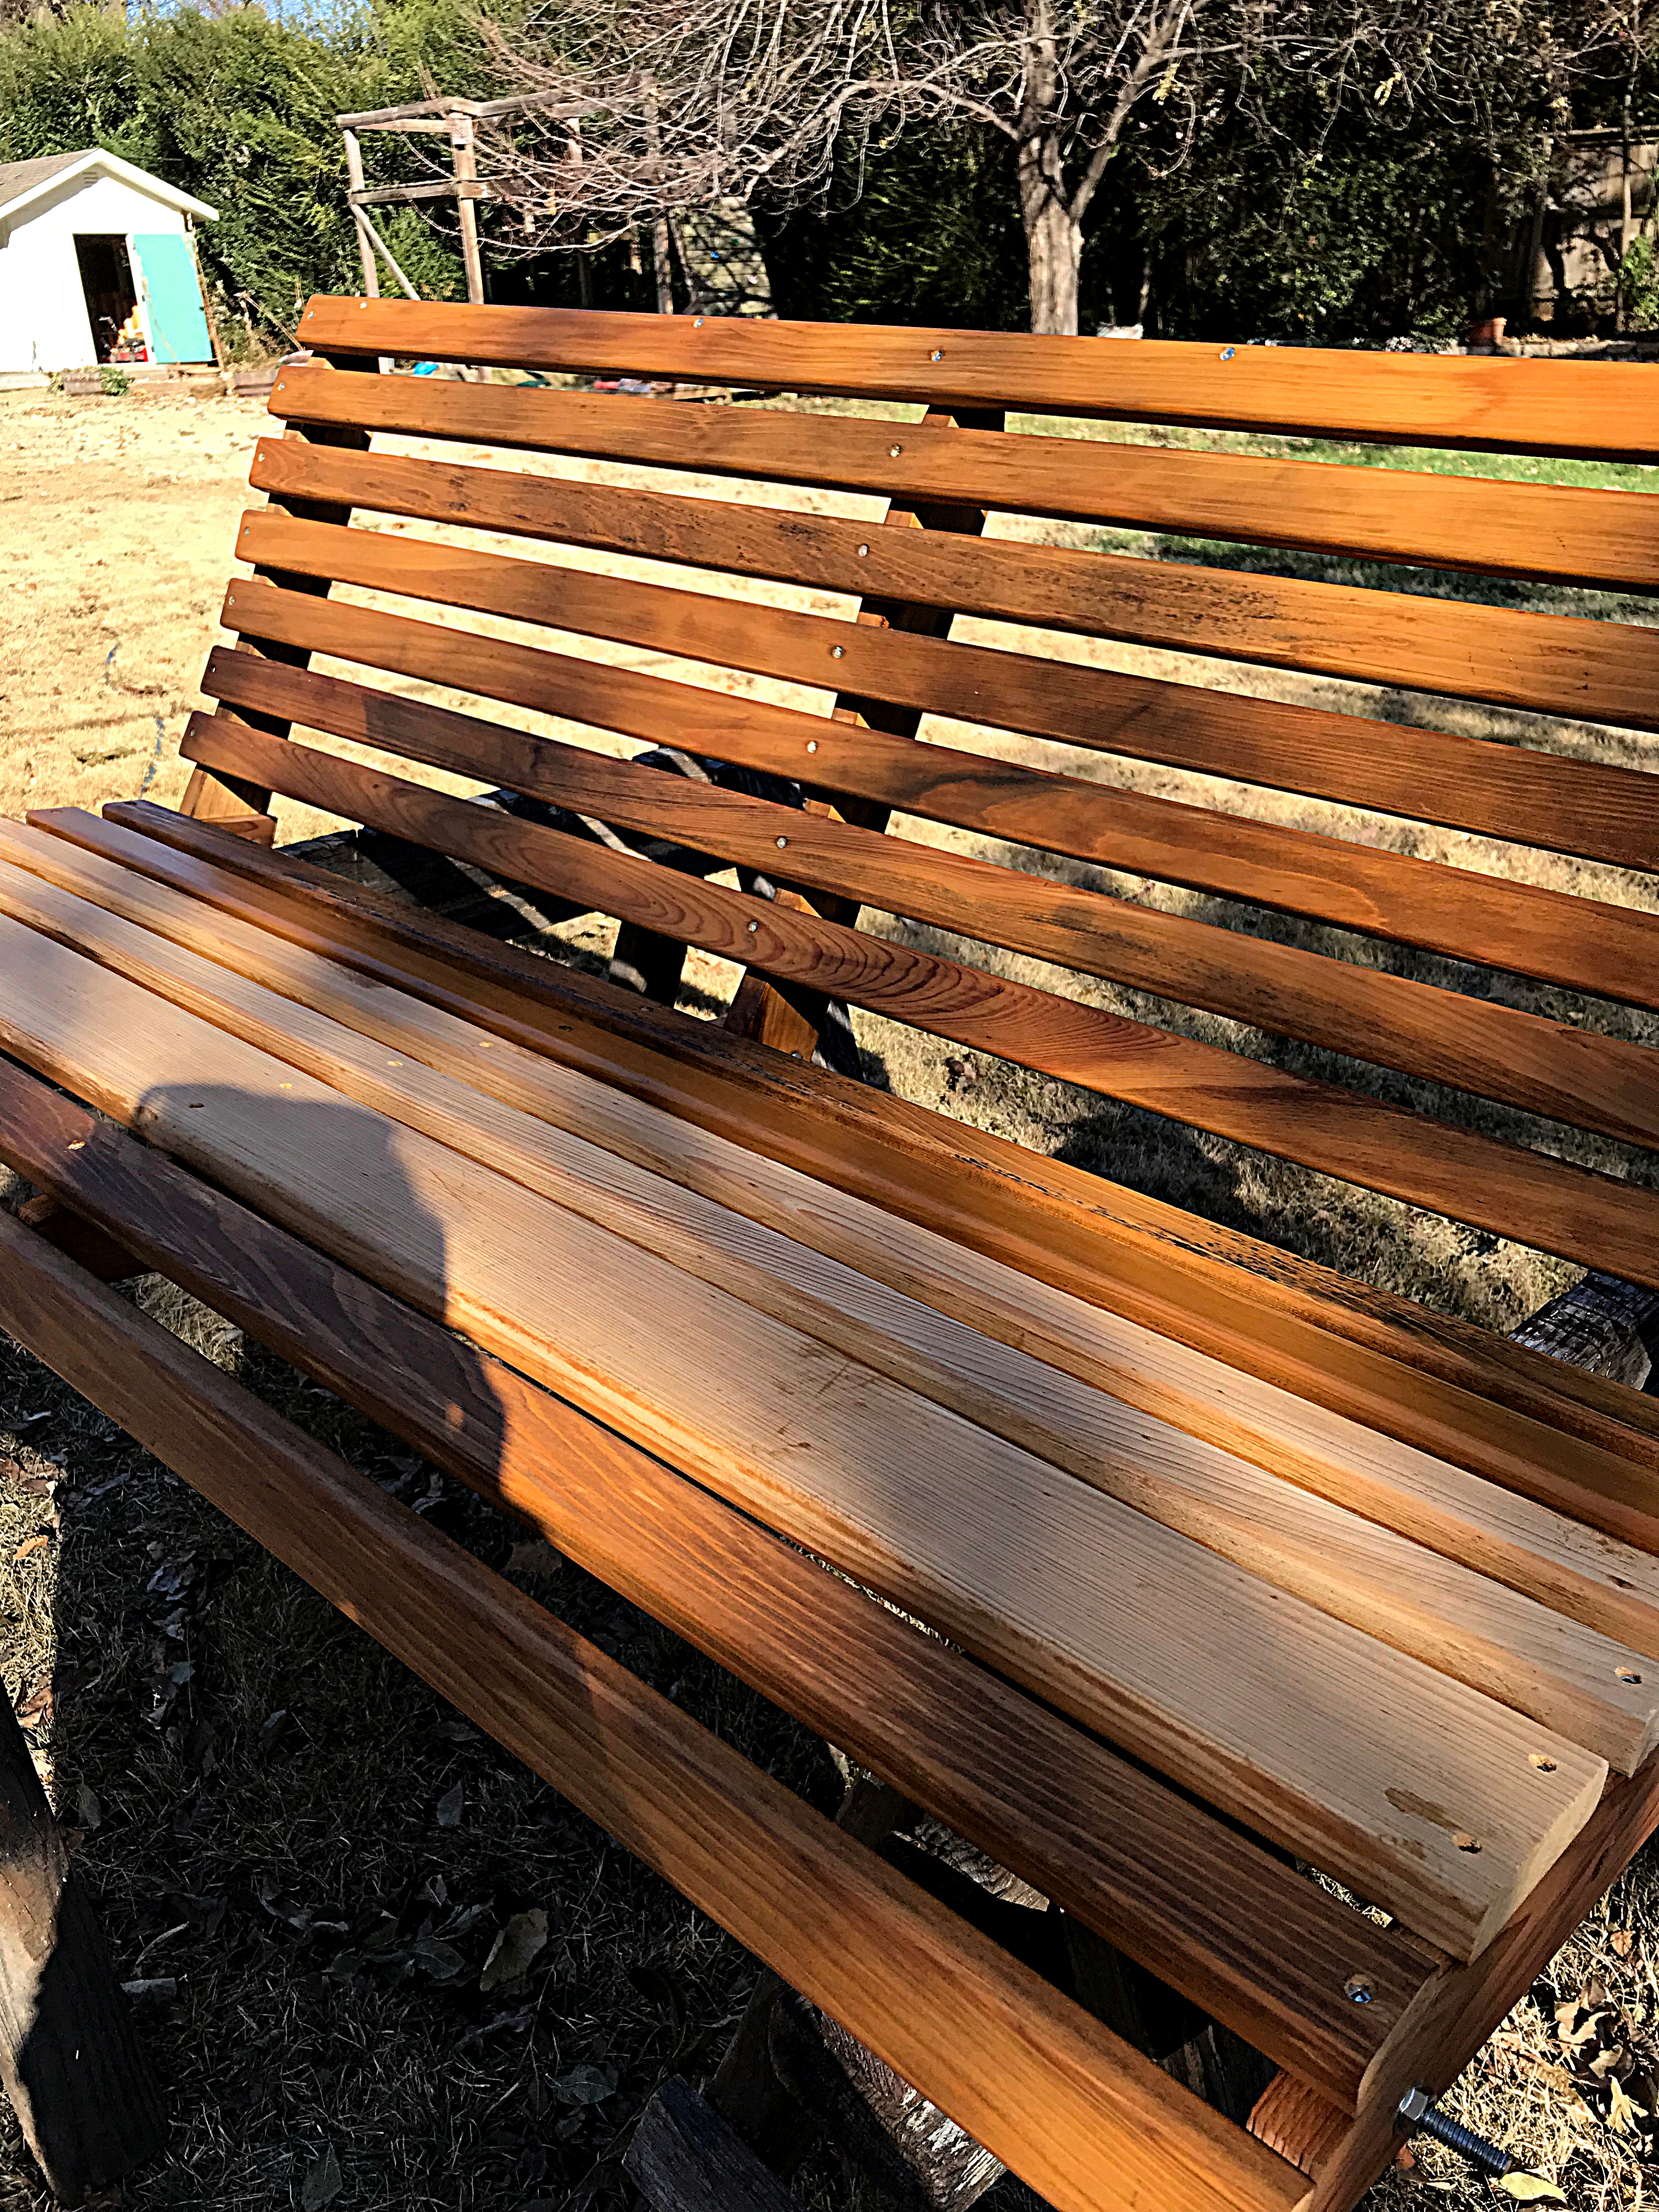
Staining
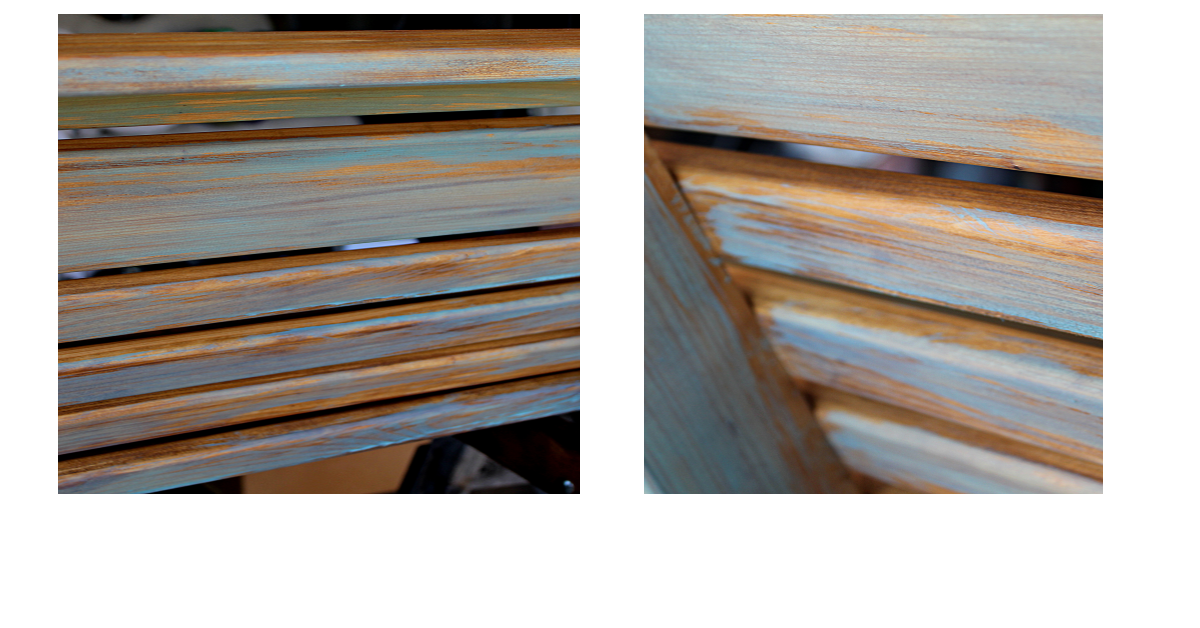
Phase Two)
Mix the paint in a 1:1 ratio with water. Use a clean, medium size dry brush (I bought a cheap pack of different sized brushes for around $8.99 for 5).
Wipe the paint off on the side of your paint cup before you apply. Less is more!!
Don’t cover the whole board, just parts of it. If you want more color you can always go back and add it. Be creative and don’t be in a hurry.
Let that coat dry over night, sand the hard paint edges, then wipe down with a clean cloth.
When your happy with the first layer, decide if you want to add a second layer of color. If you do, repeat the above step.
Note: If your project has a bottom that won’t be seen I would experiment with the second color or stain just to make sure you like it.
 Phase Three)
Using a clean dry brush apply the top coat of stain. Let set for about a minute, wipe-rub in with a clean soft cloth. Let that dry over night.
Phase Four)
If happy with the look then pat yourself on the back! You’re ready to go to the final step. (I wasn’t so I added a second coat of the stain.)
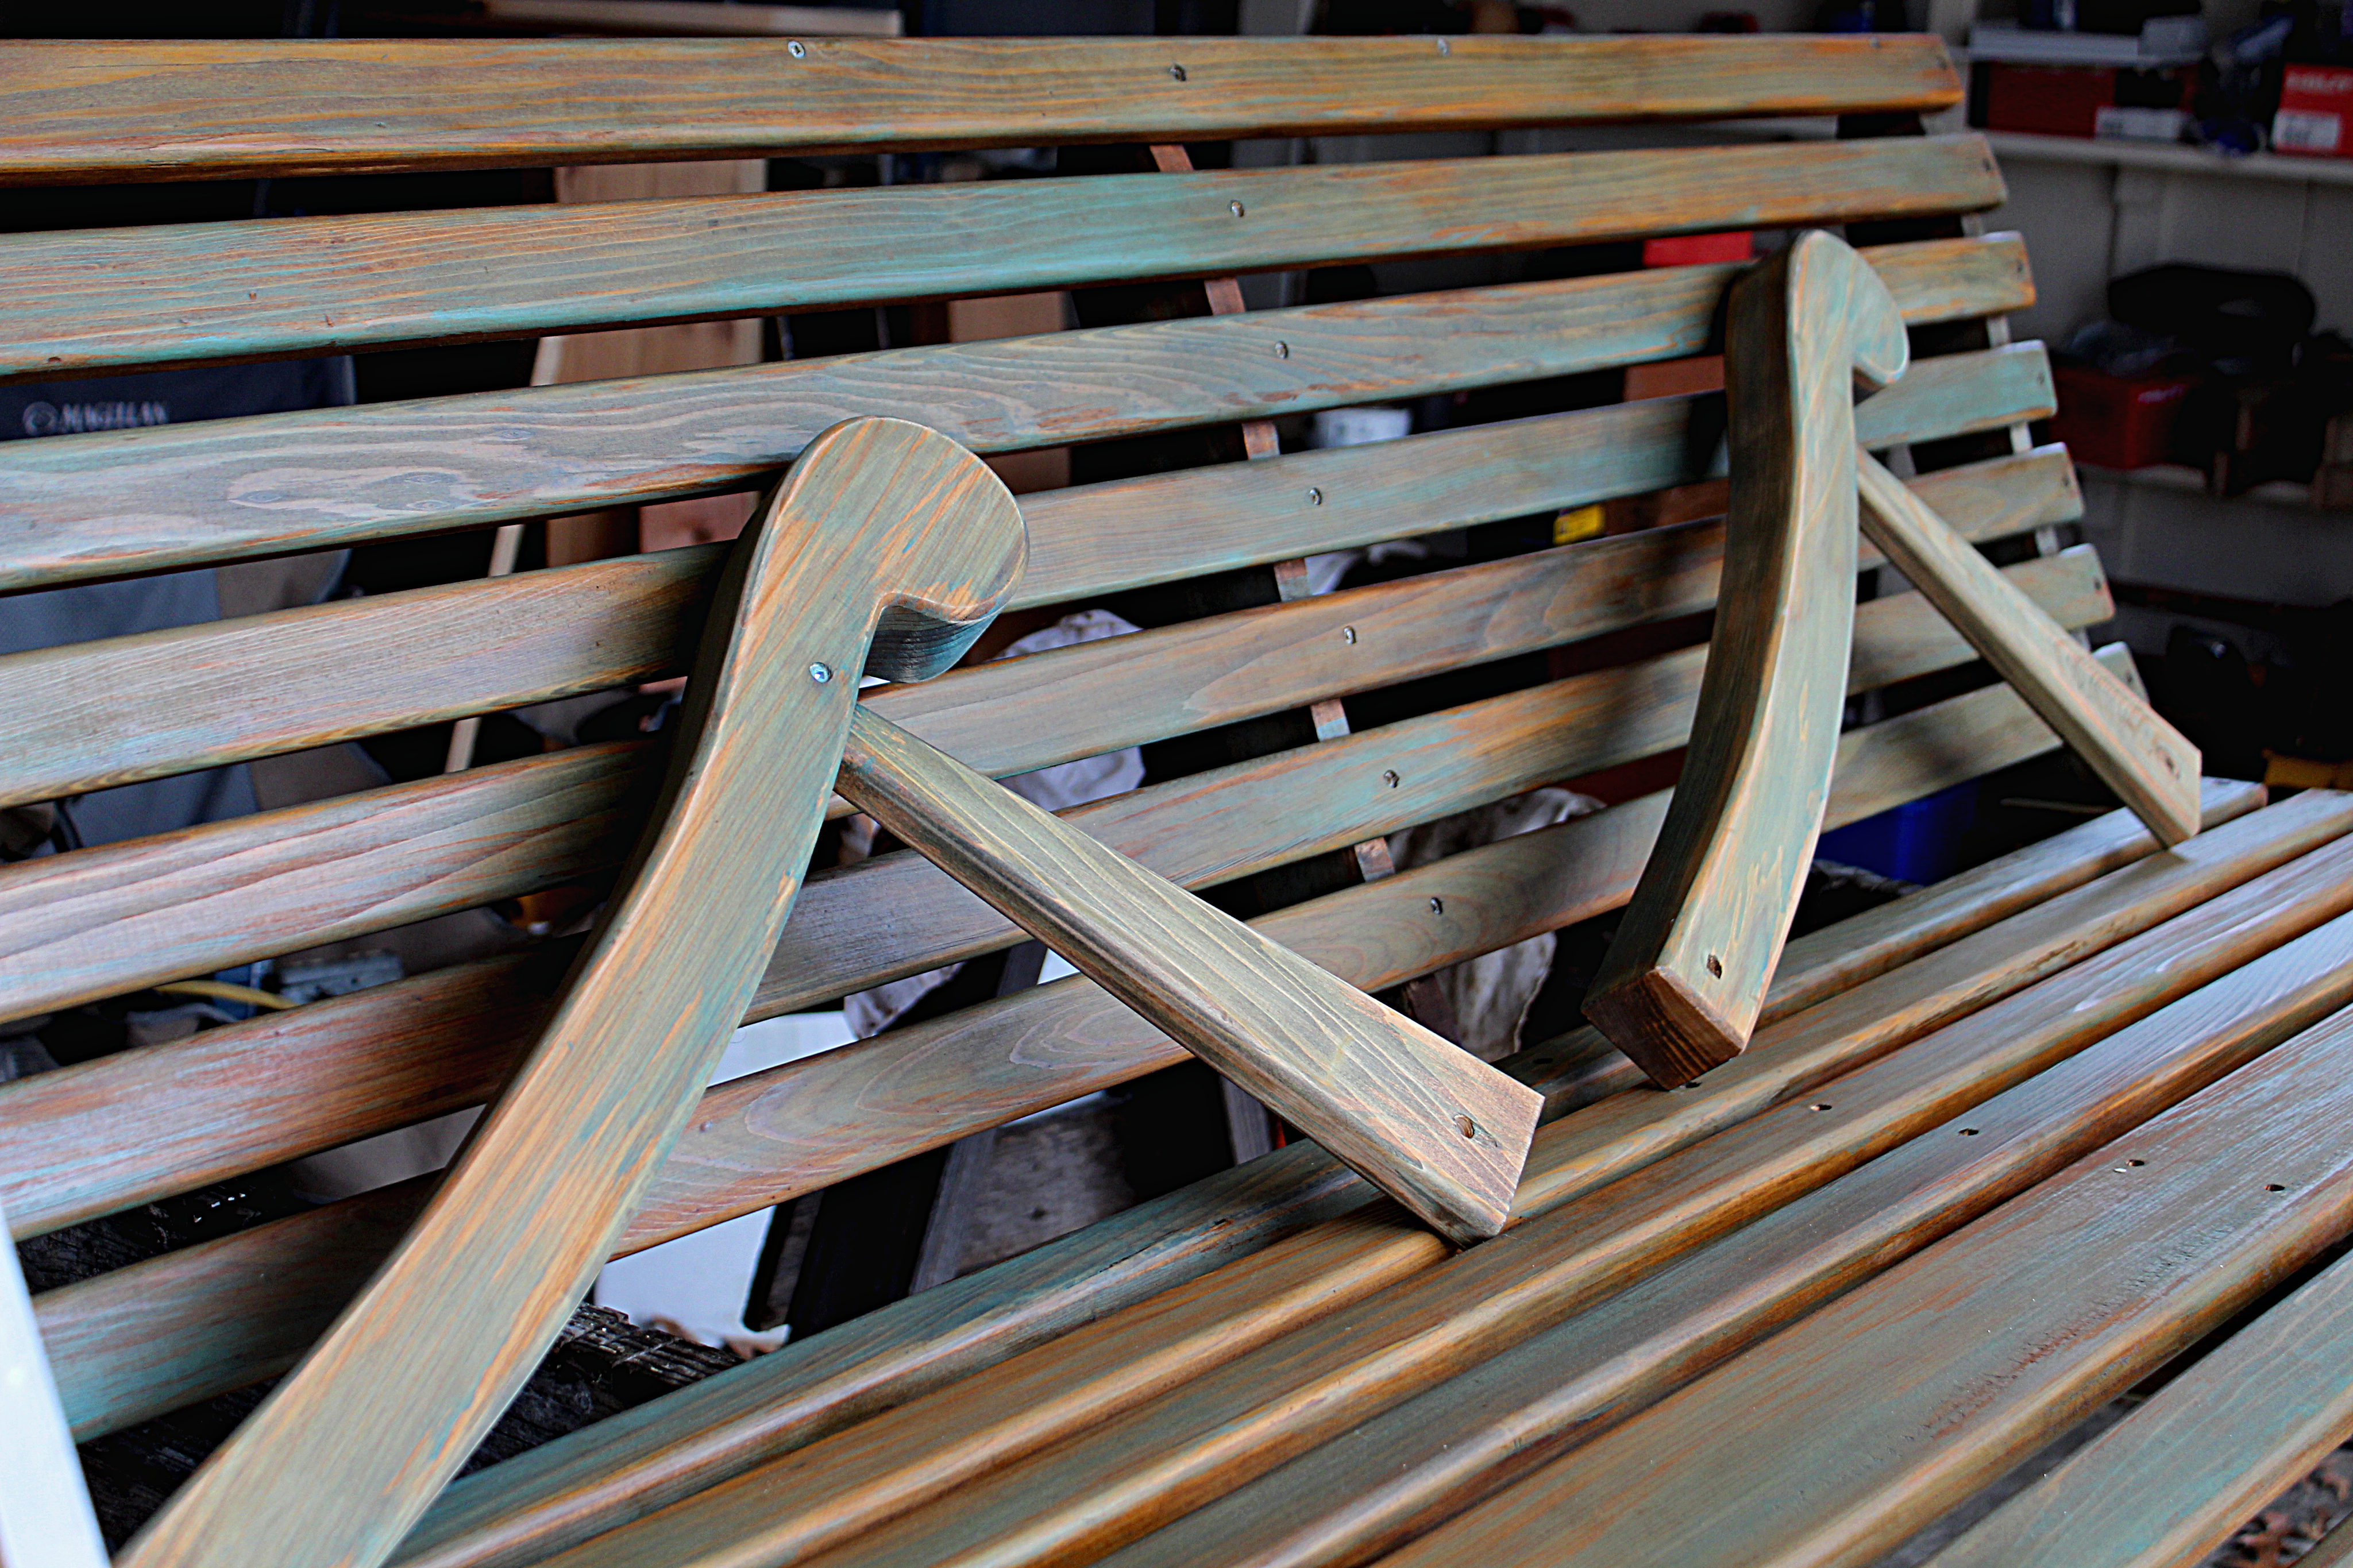
With one coat of stain.
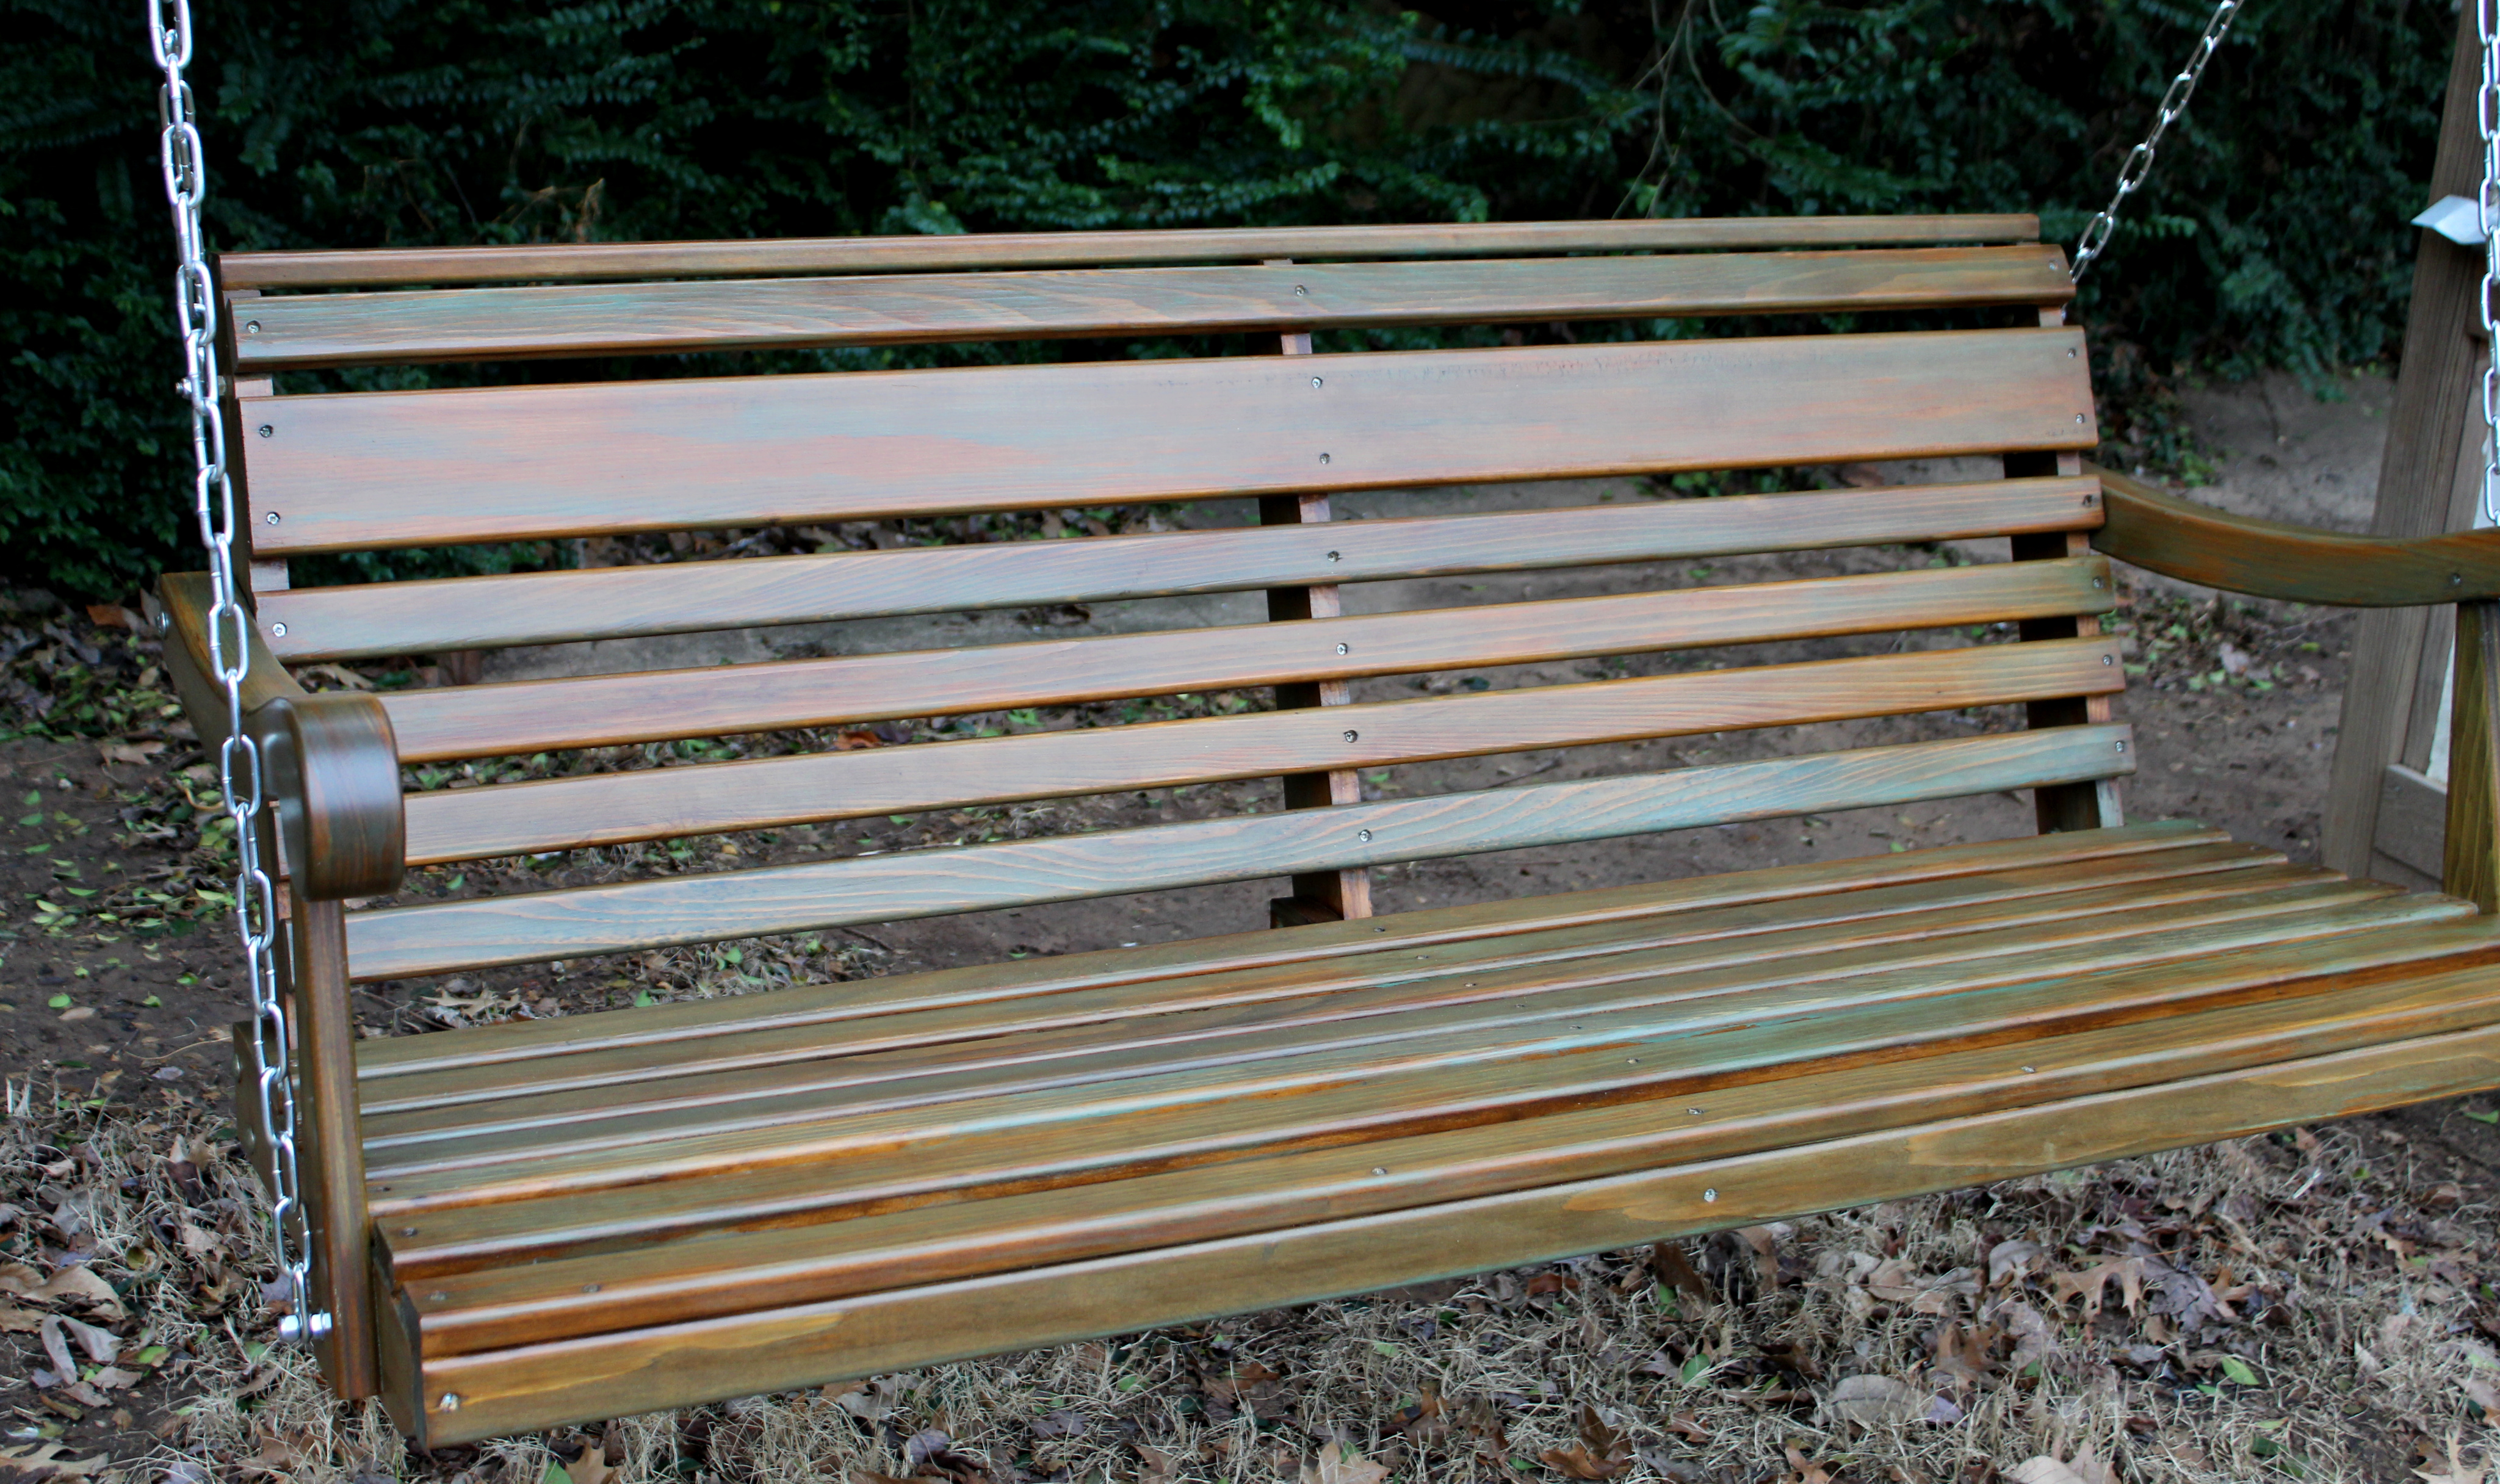
Apply a clear coat of outdoor satin polyurethane for the final step. This seals the layers, makes it really look finished, and protects it from outdoor elements.
Again, use a clean, clean brush. (see why I bought a cheap pack of brushes!) If you think it needs some touch up sanding I would do it before you seal.
Liberally apply and brush smooth the clear coat. Let that dry overnight or longer.
Note: It’s not necessary to apply two coats of polyurethane but I did…just to be sure I got every surface. My OCD shining through:)
With two coats of stain.
This project took a lot longer than I originally thought. Winter weather kept showing up and then there were the holidays.
I guess from start to finish this project took 4 days total.
The “porch” swing is now a backyard garden swing hanging from the re-purposed play fort the contractor built for our little bitty kids ages ago. But that’s okay, we finally have a place to sit by the garden, have a glass of wine, and watch our veggies grow🙂
HURRY UP SPRING!
Always,
Elise
Disclaimer: Clicking on the informative,interesting, and helpful advertisements in this post might result in a very small residual for this blog:)
You May Also Like

How to Build an Easy DIY Gar ...
March 7, 2024

Cheap BoHo Backyard Patio Id ...
May 25, 2022

Eco Friendly Everyday Home E ...
January 10, 2020

Halloween Jack-O-Lantern Com ...
October 21, 2019


Leave a Comment