


Wall stenciling is not a new decorating idea/concept by any means. When I decided I just couldn’t live with my Master Bath decor anymore I turned to wall stenciling. It is cheaper than wallpaper, more interesting than just plain wall color, and is relatively easy to do! The hardest part is choosing the stencil!
Stenciling goes back some 35,000 years when the bored caveman had some free time and decided to decorate with plant pigments against his cave wall. Usually with his hands or his poison arrow blow tube. I’m sure he didn’t think much of it at the time but low and behold he just discovered stencil art.

Since then, mankind has stenciled about everything you can think of; clothes, books, caves, buildings, graffiti, tatoos – bodies, etc. Really anything that can hold a shape or form can be used as a stencil and literally anything that has a solid surface can be stenciled on!
Bathroom Updo!
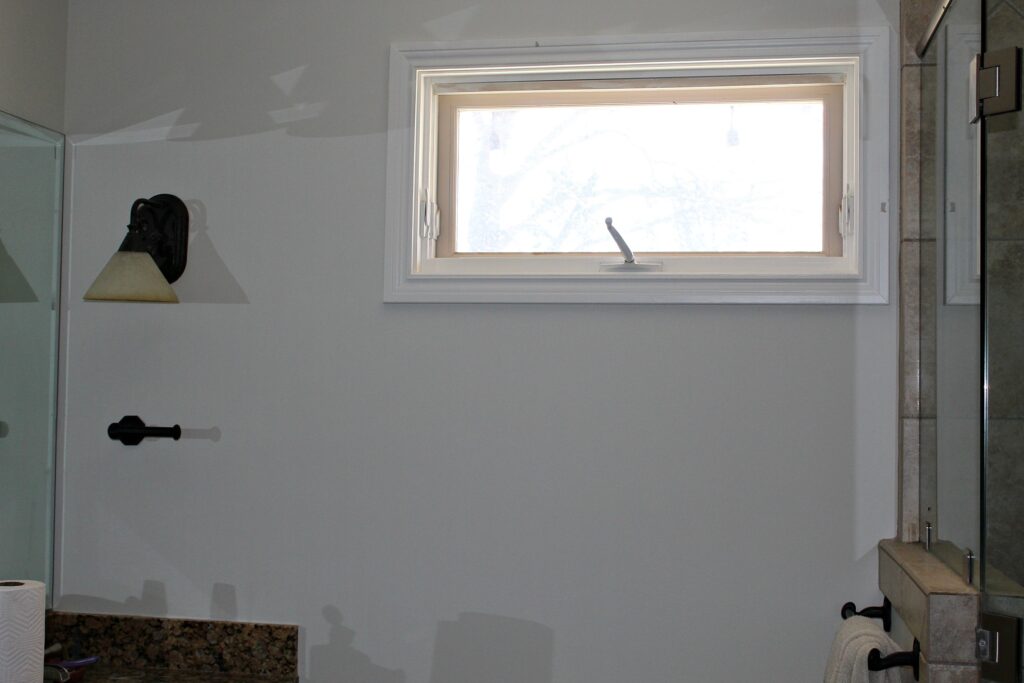
For a decor upgrade and definite mood elevator, I turned to stenciling for our boring old bathroom. I’ve been thinking about it for a long time but never felt I had the time to start and finish in a decent amount of time until recently.
Aging out of certain mom duties…like being a chauffeur to my youngest…has freed up some extra hours in the day; hence stenciling and hence BLOGGING about it:)
As stated in Part 1 of my stenciling blog saga, wallpapering has never been my thing; way too much possibility of messing up. Way, way too many choices, and way, way, way too much work. If it was just a border then I could deal with that but then borders are so ’90 right? and I didn’t even like them when they were in style!
Stenciling Versus Wallpaper!
Stenciling, on the other hand, is a whole different deal.
- It’s cheaper (by A LOT).
- It generally takes fewer tools.
- You can be more creative with colors and placement. It’s like creating your own wallpaper; you’re your own designer and the sole creator of your world!
- Plus it’s really fun!
How To Stencil Your Boring Bathroom
After the new fresh base coat was applied, the beat-up, brownish pink moldings really stood out, like dog dodo! So THE MAN had to spruce up the woodwork with our 25 plus years of “go-to” molding color…Silver Lining by Pratt & Lambert.
P.S….I don’t know what came over me during the initial remodel when I picked out the band-aid beige molding color but whatever! Thank God, that phase is over.
Shop Paint – Compare
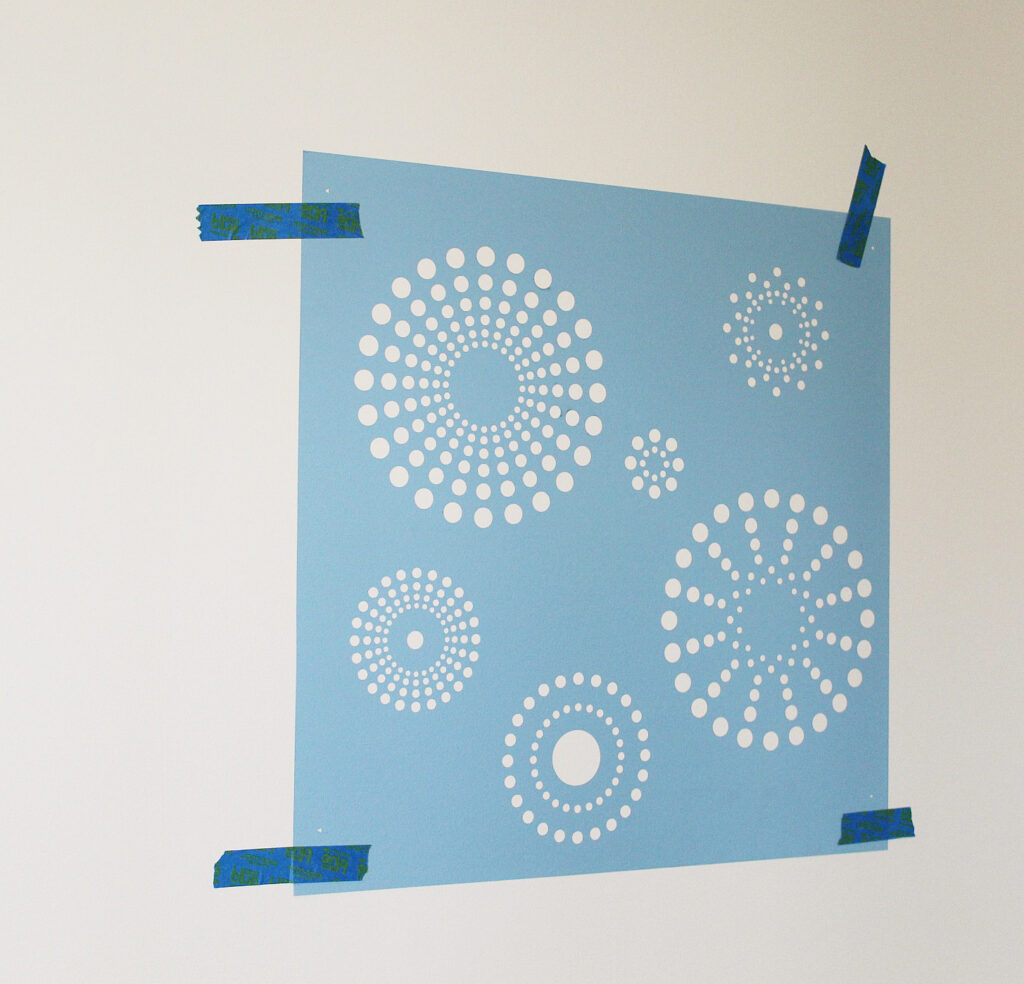
After the bathroom was back to a decent shade of off white, fresh, and clean. The time came to chose the stencil and the colors. I had gold, silver, and a shiny off white in mind to stay neutral and go with the goldish granite. I had my eye on the P&L metallic line, the colors are very rich and have a lot of depth but $45 a half-gallon just wasn’t in the budget.
I opted for a trip down the street to the local craft store in search of a cheaper alternative. There wasn’t a lot of metallic paint choices so I grabbed the largest amount for the least amount of money, $20ish compared to over $100 was worth a try.
After that first painted stencil I knew my trip down the street was worth the effort; I loved the color! I used an acrylic water-based paint…just so you know its good on walls and wood but not metal or plastic.
In the beginning…
Once the materials were figured out and Contractor approved; the makeover was underway.
Must Haves For A Stencil Project
- pair of good stencil brushes
- paint or paints
- small foam rollers
- painter’s tape or spray adhesive,
- a really sturdy ladder/bench especially for short people like myself
- some really good tunes
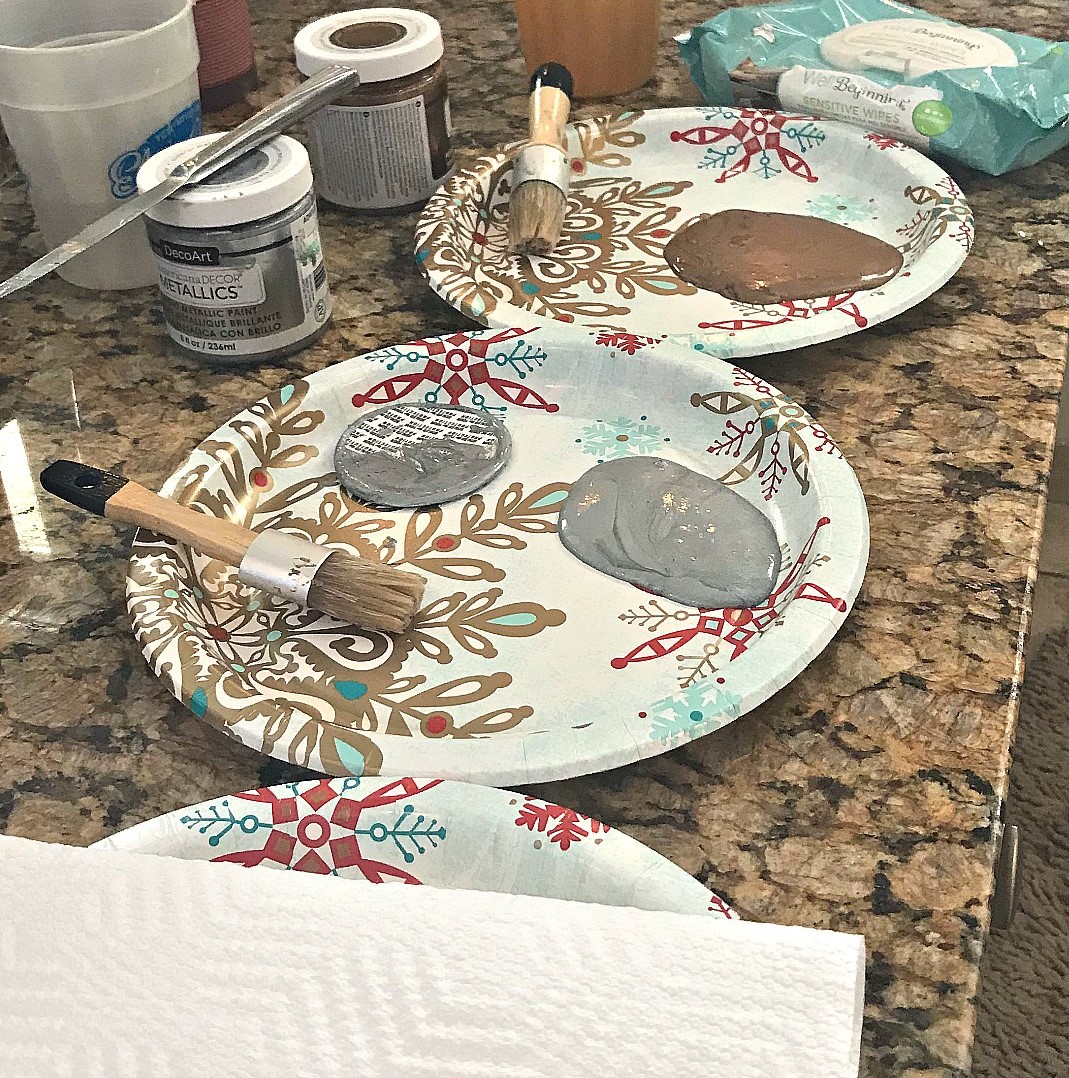
- paper plates
- paper towels
- baby wipes! Yep! baby wipes! They are a project saver!
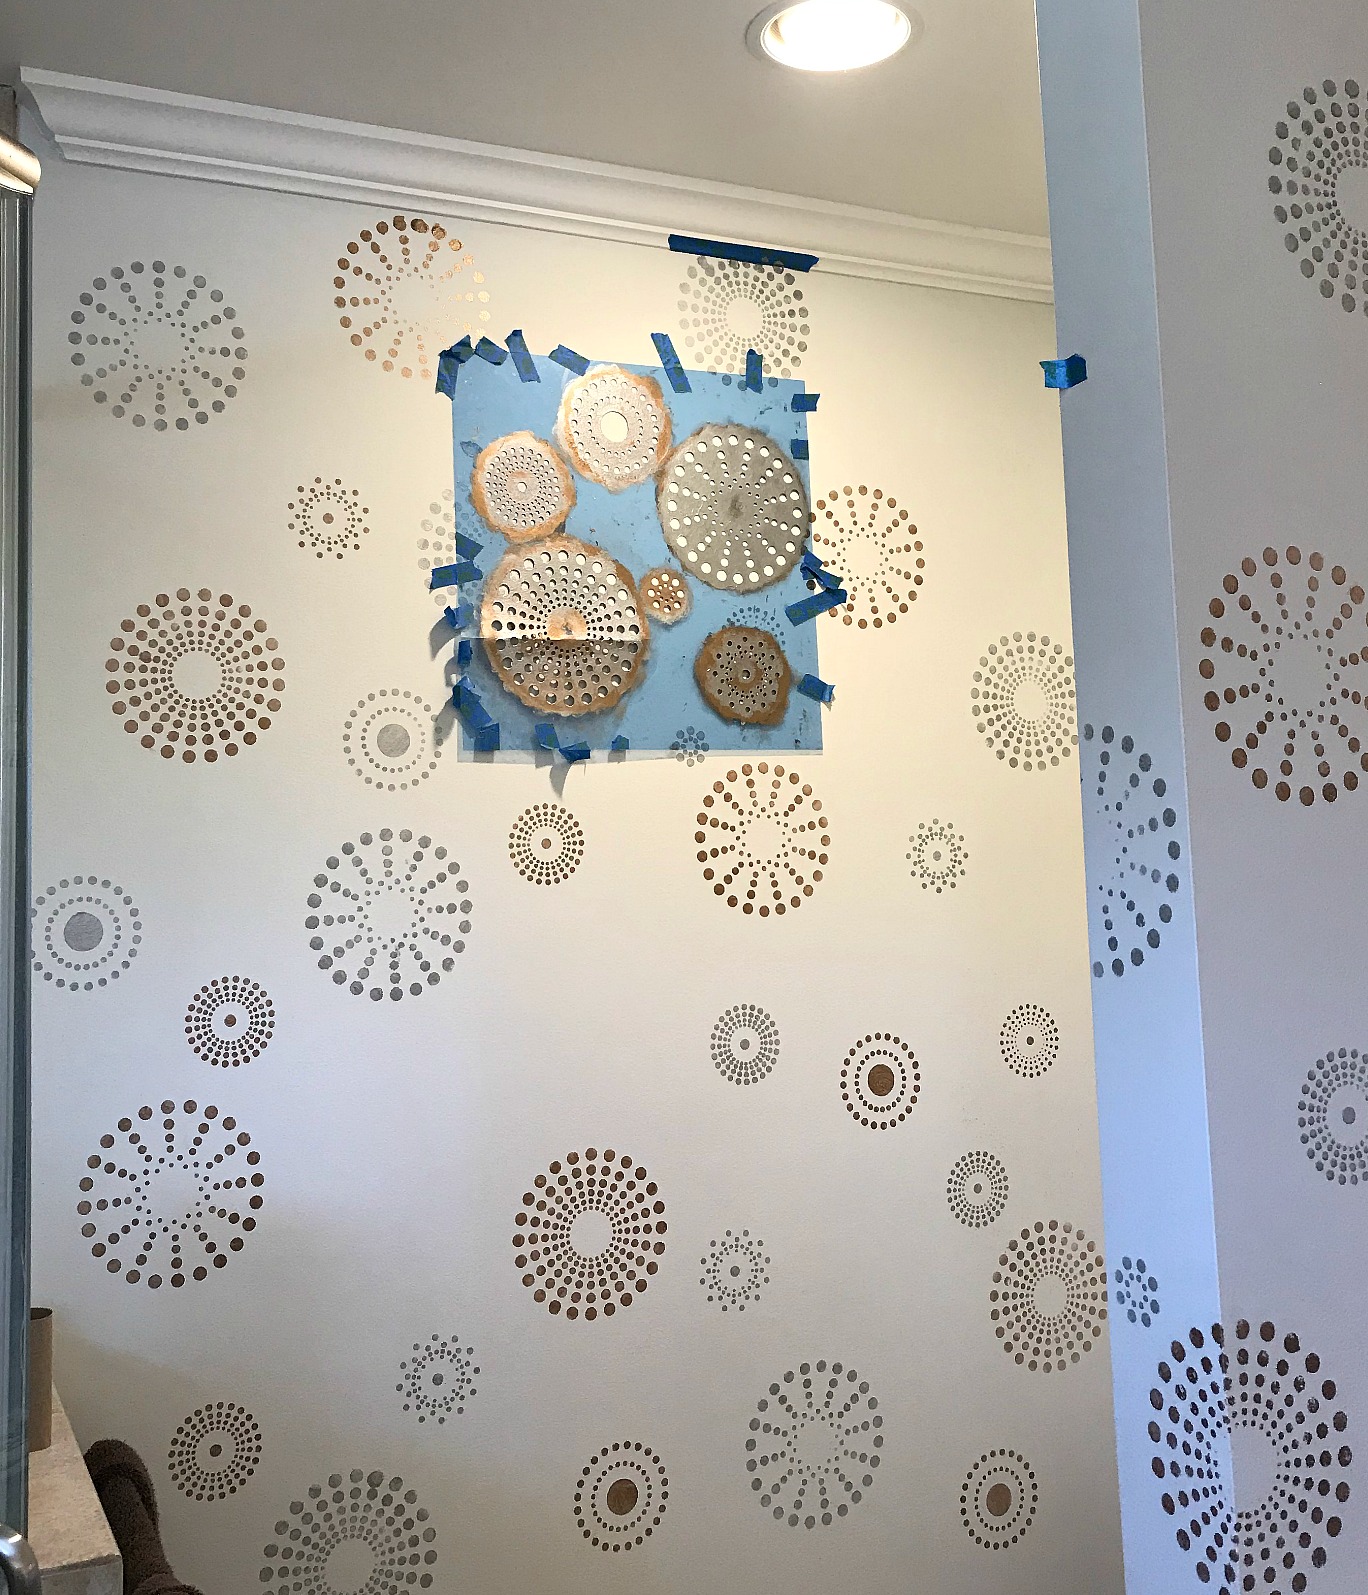
- Stencil Pattern! I bought mine on Houzz for around $35.
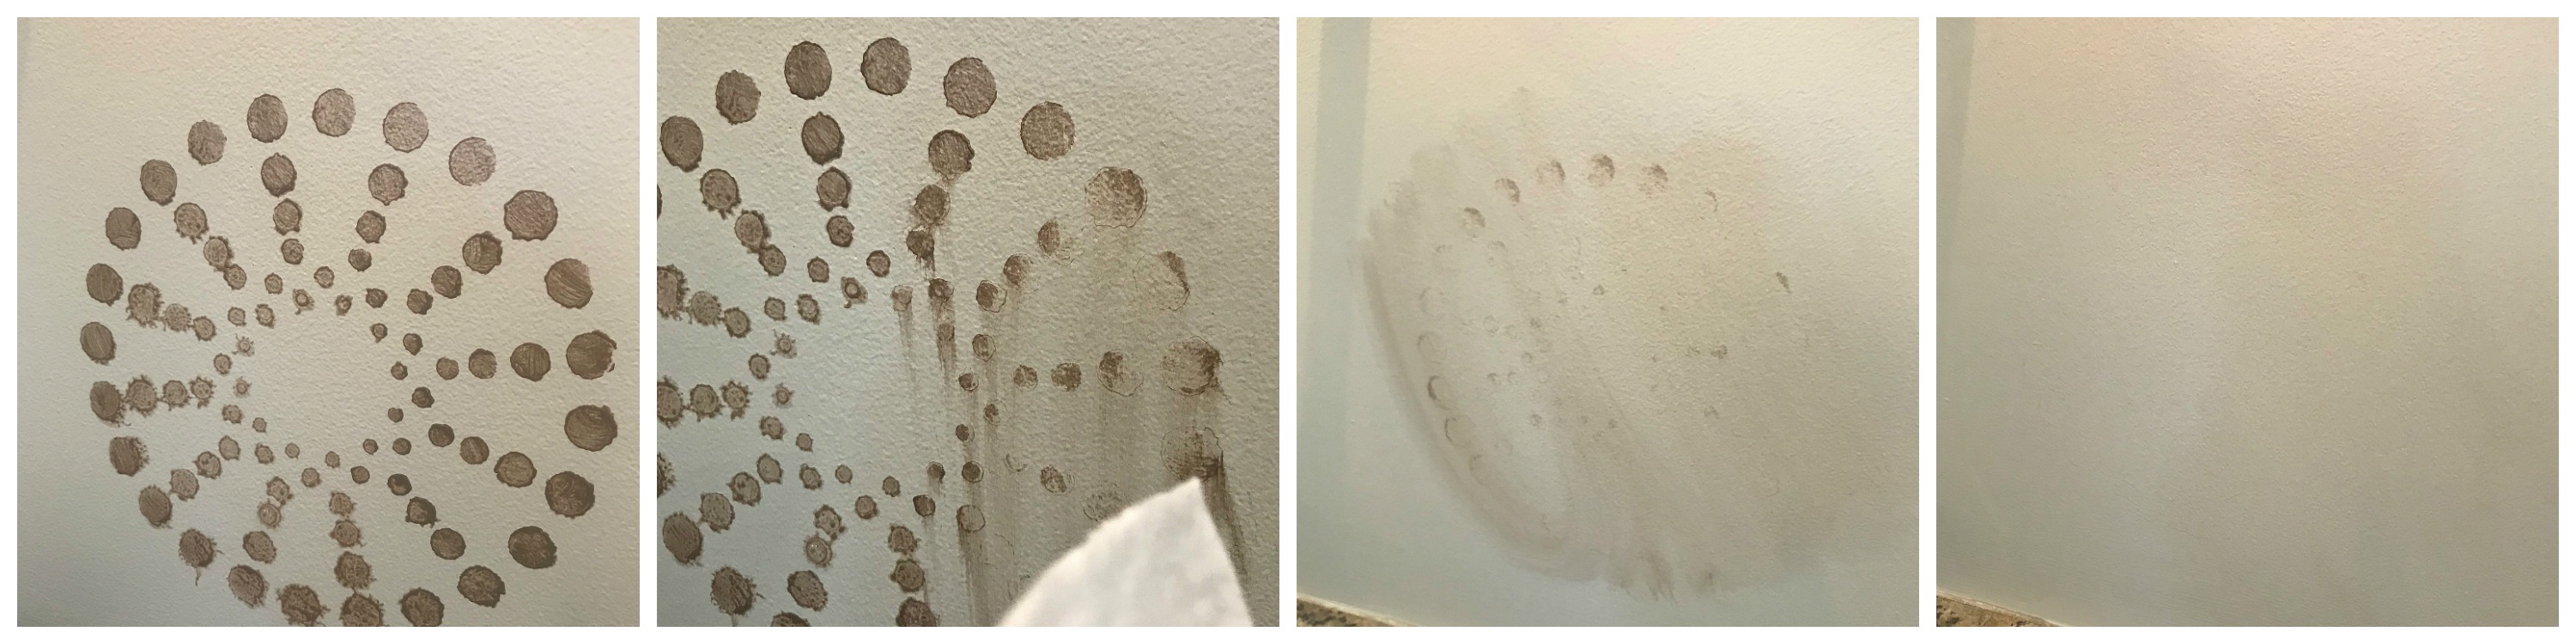
Baby Wipes in action…Great for mess ups!


Paper plates and paper towels are truly a must. Paper plates are semi absorbent so the paint doesn’t slide all over the place.
The paper towels act as a paint brush blotter so you don’t end up with big gobs of paint on your brush.
If you don’t blot those gobs, I promise, they will make it behind your stencil…hence the need for baby wipes; not good:( Note: Christmas paper plates are not essential).
Once you get comfortable with the stencil/blot/apply action, the areas fill up pretty fast. It’s kinda like regular painting where the prep is the most time consuming but extremely essential.
I estimate it took about 14 total hours of fun, creative, easy labor (except the hard to get to corners) to finish this job. The hardest part for me and my compulsive self is knowing when to quit…That’s a real issue, I promise:)
I absolutely love the end result! Instead of being reminded of how boring this room use to be, I walk into it every day and smile.
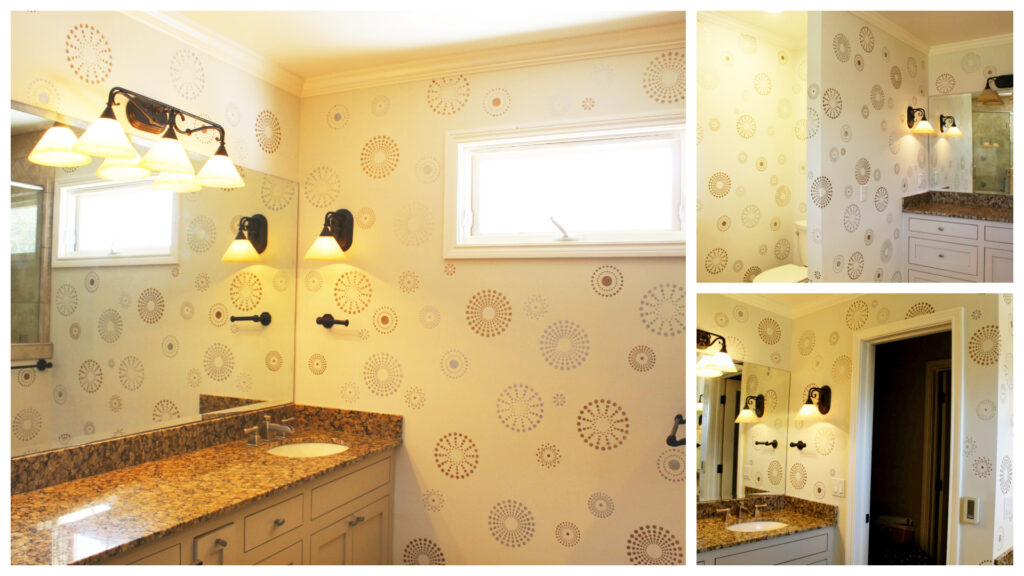
Accomplishing this goal in a relatively short time makes my long list of redos and remodels not so daunting. Now if my contractor hubs would cooperate it might be a total makeover year:)
In the next couple of weeks keep your eyes out for the last and final segment in this remake series, Accessories – Part 3. If you have any questions on techniques, materials, anything please don’t hesitate to reach out to me.
Always,
Elise
Disclaimer: I’m not a professional decorator, painter, or contractor (like my hubs). Just someone who always looks forward to the next project and on the lookout for a new idea.
Here are a few other quick and easy remodeling ideas from TCC👇
Disclaimer: This post contains affiliate links.
You May Also Like

How to Build an Easy DIY Gar ...
March 7, 2024

DIY WROUGHT IRON PATIO FURNI ...
April 17, 2019

Just Like New…Wrought ...
April 15, 2019

Deco Makeup Chair Makeover-T ...
September 18, 2018

Leave a Comment